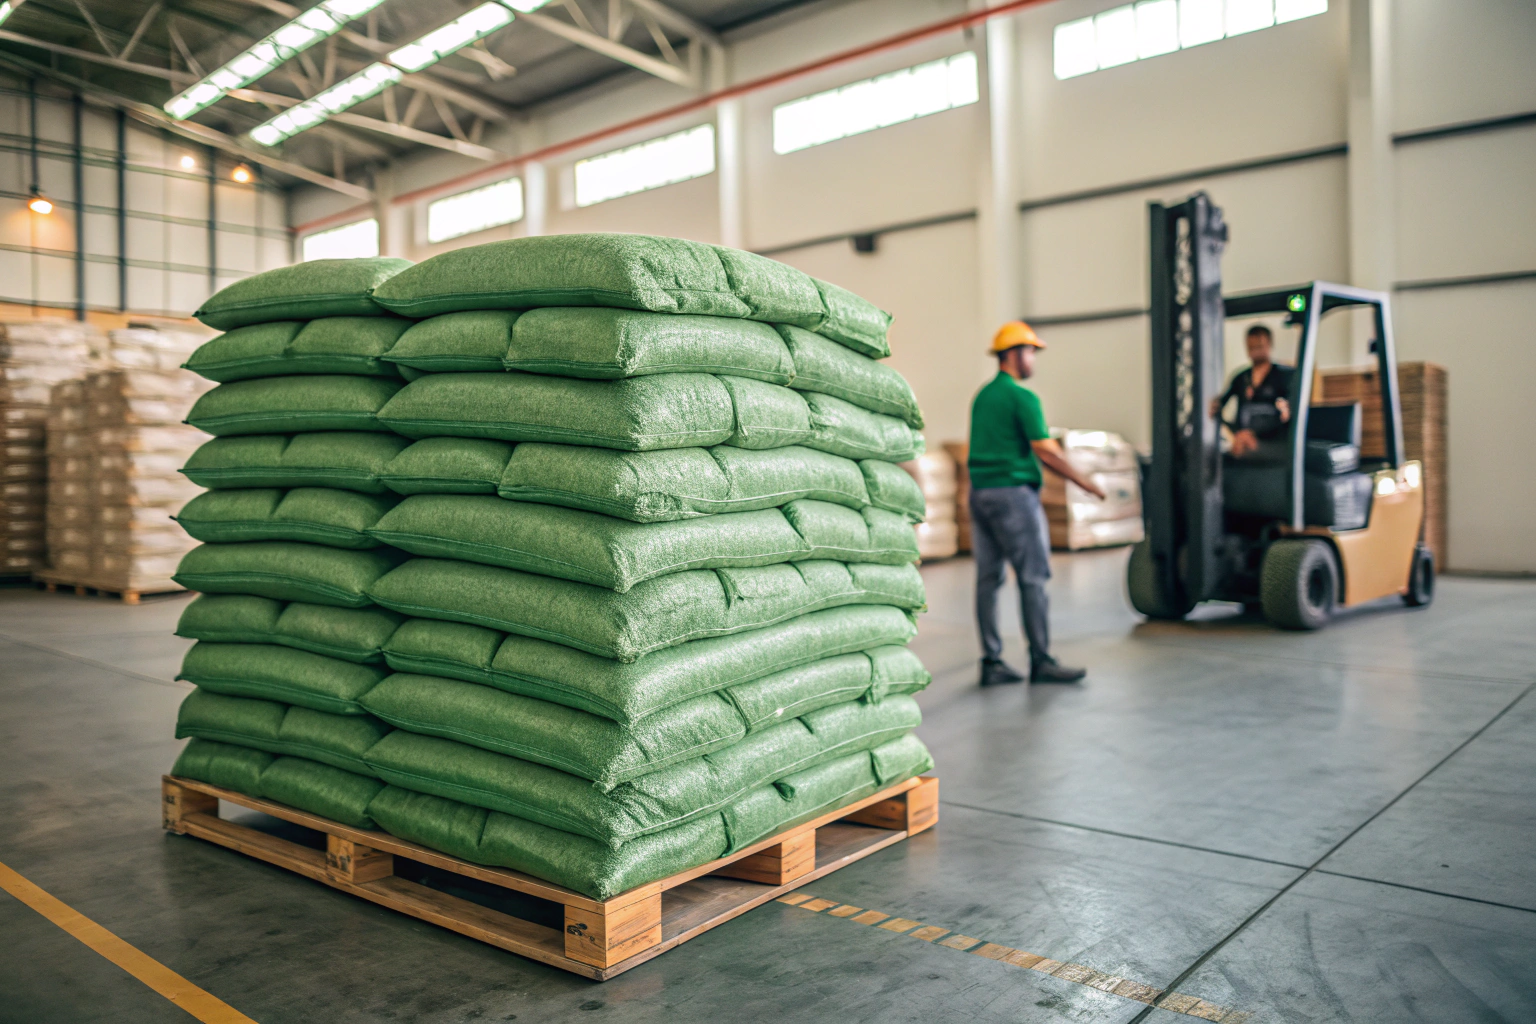
You're staring at the loading plan. You've got a 20-foot container to fill with 300 sacks of green coffee. Every wasted inch of space is money lost in shipping costs. Every unstable pallet is a risk of damaged goods and a nightmare claim. So, how do you pack more in, safely and securely? Pallet configuration isn't just stacking bags; it's a critical logistics puzzle that directly impacts your shipping costs, cargo safety, and efficiency at the destination port. A poorly planned pallet can cost you hundreds in wasted freight and thousands in ruined product.
The goal is simple: maximize the container's cubic volume while ensuring absolute stability during a rough ocean voyage. This requires balancing three key elements: the dimensions of your sacks, the standard size of pallets, and the strict internal dimensions of the shipping container. It's not guesswork. It's a precise calculation. At BeanofCoffee, after loading thousands of containers from our Yunnan origin, we've standardized configurations that protect our clients' coffee and optimize their landed cost. Let's break down the system.
What Are the Standard Dimensions and Weight Limits for Coffee Export Pallets?
First, you must know the rules of the game. There is no universal "coffee pallet," but there are industry standards that dictate efficiency. The most common pallet in international shipping is the ISO standard pallet, often the 1200mm x 1000mm size (approx. 47.2in x 39.4in). This size fits optimally in standard shipping containers and is widely accepted globally.
But the pallet itself is just the base. The real constraints come from:
- Container Door Dimensions: A standard 20ft or 40ft container has a door opening about 7'6" (2.28m) in height and 7'8" (2.33m) in width. Your stacked pallet must clear this.
- Container Internal Height: The max internal height is usually about 7'10" (2.39m). You must account for the pallet's height plus the goods.
- Weight Limits: This is crucial. A 20ft container has a max payload of about 28,000 kg. But the road weight limits at destination (e.g., in the USA or Europe) are often stricter, typically 20,000-22,000 kg per container. You must design your pallet load to keep the total container weight under this limit.
A critical, often overlooked, detail is the pallet's own tare weight (15-25 kg) and the weight of the stretch wrap and any dunnage. This eats into your payload. So, optimization isn't just about fitting more bags; it's about fitting the maximum allowable weight in the most space-efficient way.
What Are Common Coffee Sack Sizes and Their Impact on Palletizing?
The sack is your building block. The most common sizes for green coffee are:
- 60 kg Sack: The global standard. Typical dimensions: ~ 100 cm (H) x 60 cm (W) when laid flat and empty. The filled dimensions are roughly 70-75cm tall and 35-40cm in diameter when standing upright.
- 69 kg Sack (152 lbs): Common for Colombian and other origins. Slightly larger footprint.
- 70 kg Sack: Used in some African and Asian origins.
- Vacuum Packs: For premium lots, these are brick-shaped and denser, allowing different stacking patterns.
The sack's flexibility is key. Jute or sisal sacks are not rigid boxes; they bulge and settle. This means you cannot calculate space as if stacking perfect cubes. You must allow for a "settling factor" and use interlocking patterns to create a stable, unified block. The choice between laying sacks flat or standing them on end also drastically changes the pallet profile and stability.
How Do Container Dimensions Dictate the Pallet Layout?
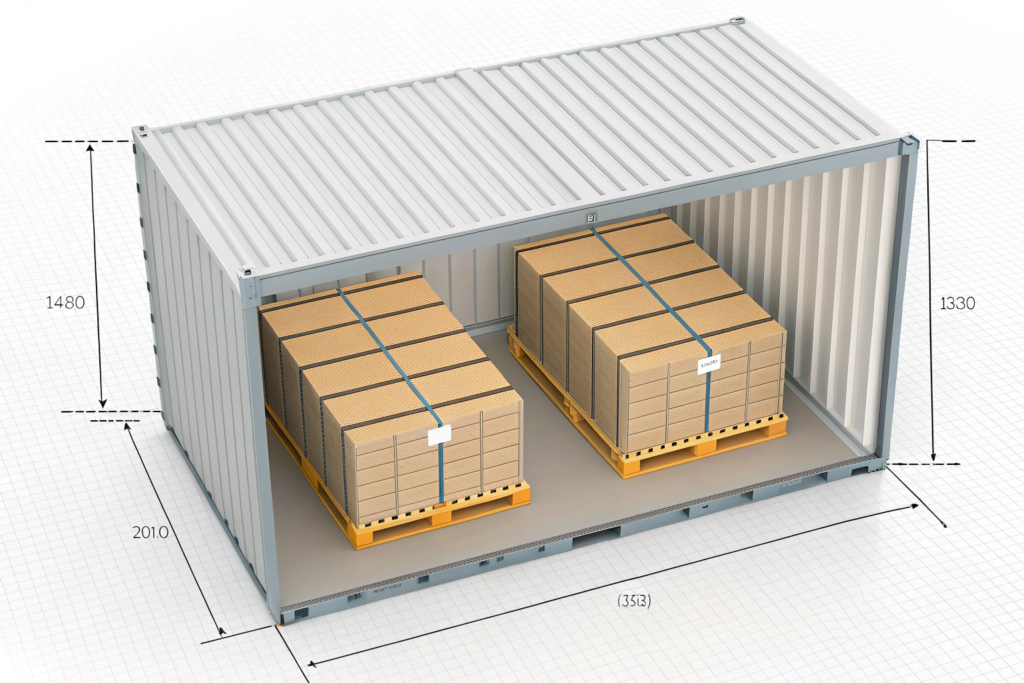
You must work from the container inward. For a standard 20ft container (internal dimensions ~ 5.9m L x 2.35m W x 2.39m H), the width is the primary constraint. The goal is to place pallets side-by-side without wasting lateral space.
- Standard 1200mm x 1000mm Pallets: Two of these placed side-by-side (1000mm + 1000mm = 2000mm) fit perfectly within the 2350mm container width, leaving about 175mm (7 inches) of total space for maneuvering and airflow. This is the ideal, efficient fit.
- Alternative 48" x 40" Pallets (US Standard): These are slightly larger (1219mm x 1016mm). Two side-by-side exceed the container width. Therefore, they must be loaded in a single row, turning lengthwise, which wastes enormous space. We strongly recommend insisting on ISO 1200x1000mm pallets for all international shipments.
The length and height then determine how many pallets you can stack vertically and how many rows you can fit front-to-back. Getting the width configuration wrong from the start makes all other optimization impossible.
What Are the Most Efficient and Stable Stacking Patterns?
Now for the actual stacking. Throwing bags on a pallet any which way will create a dangerous, unstable load. The two proven patterns for cylindrical sacks are the interlocking pinwheel pattern and the brick layer pattern.
The interlocking pattern is the gold standard for stability, especially for tall stacks. You place the first layer of sacks in a specific arrangement (e.g., 5 sacks: three next to each other, then two placed in the gaps created on the next row). The second layer is placed with sacks straddling the seams between sacks in the layer below. This locks the entire structure together, preventing individual sacks from shifting. It's like building a wall with interlocking bricks.
The brick layer pattern is simpler but less interlocked. Sacks are placed in straight rows, with the seams of one row aligned with the middles of sacks in the row below. It's faster to build but not as resistant to lateral movement.
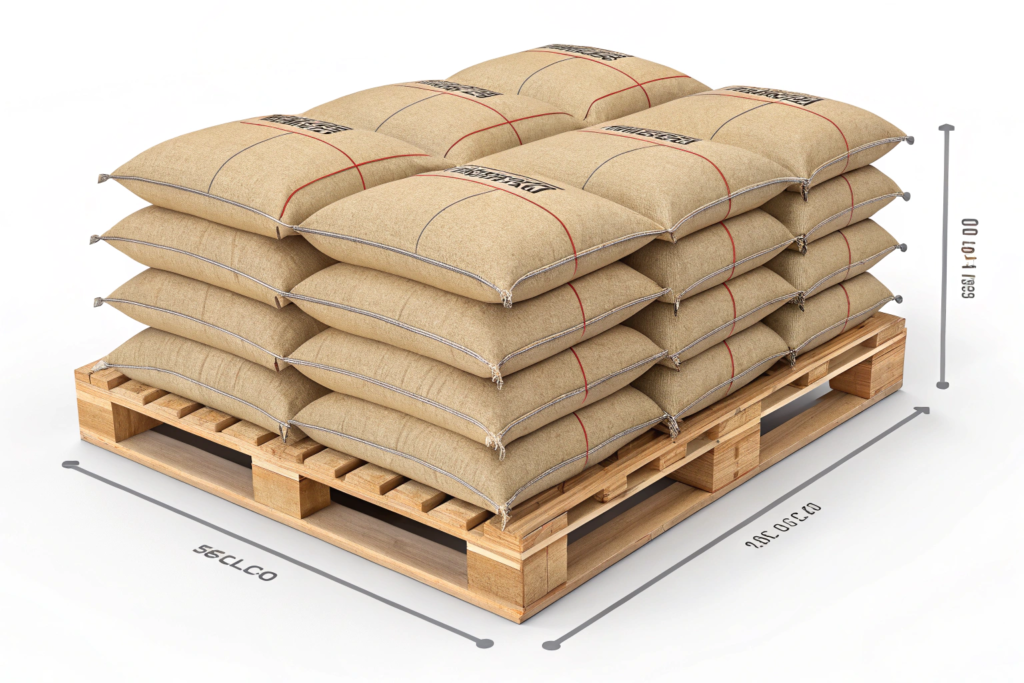
For our standard 60kg sacks on a 1200x1000mm pallet, the most common stable configuration is 5 sacks per layer (3 long-ways, 2 in the gaps) or 4 sacks per layer (in a 2x2 block), stacked 10-12 bags high. The choice between 4 or 5 per layer depends on the exact sack diameter and the desired total pallet height. The ultimate goal is to build a solid, rectangular column that can be tightly wrapped.
How to Calculate the Optimal Number of Sacks Per Pallet Layer?
This is practical math. Let's walk through an example for 60kg sacks with a ~38cm diameter on a 1200mm x 1000mm pallet.
- Pallet Width (1000mm): Two sacks side-by-side (38cm + 38cm = 76cm) fit with room to spare. You have ~24cm leftover.
- Pallet Length (1200mm): Three sacks in a row (38cm x 3 = 114cm) fit well.
- The "5-Bag" Pattern: Place three sacks lengthwise. The gaps between them are about half a sack width. You then place two more sacks in those gaps on the same layer. This uses the space efficiently and creates a interlocked base.
- Check Stability: The sacks should be snug but not over-compressed. There should be minimal overhang beyond the pallet edges (max 2-3cm).
You then multiply the bags per layer by the number of safe stacking layers. The safe stacking height is determined by the compression strength of the bottom sacks. A good rule is not to exceed 12-14 sacks high for a 60kg bag. This results in a pallet load of 50-60 bags, weighing 3000-3600 kg. You must then check if this weight, multiplied by the number of pallets, stays under the container's road weight limit.
Why is Interlocking Crucial for Ocean Freight Stability?
The ocean journey is brutal. The container is constantly vibrating, accelerating, decelerating, and rolling. A non-interlocked stack behaves like loose marbles—it can gradually shift, leading to a total collapse. This is called "cargo shifting."
An interlocked pattern turns individual sacks into a single, monolithic unit. The friction and mechanical locking prevent movement. When you then apply heavy-duty stretch wrap under tension, you further compress this unit, making it even more rigid. This is non-negotiable for protecting your coffee from damage and avoiding costly insurance claims. It’s a core part of our Shanghai Fumao loading protocol to ensure your beans arrive exactly as they left.
How to Properly Secure and Protect Palletized Coffee Sacks?
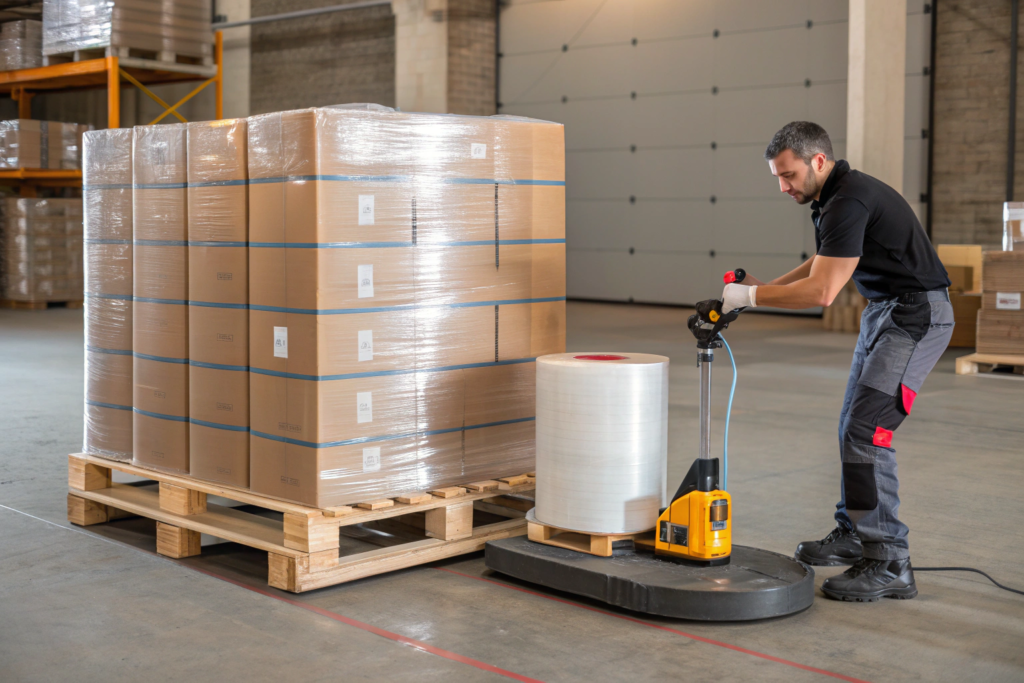
Stacking correctly is only half the battle. Securing the load for transit is the other half. The primary tool is plastic stretch wrap, but using it wrong is as bad as not using it at all.
You need industrial-grade, pre-stretched pallet wrap. The standard is 20-25 micron thickness, 500mm width. The pallet should be wrapped from bottom to top, with at least 50% overlap between layers. The wrap must be applied under significant tension to compress the sacks together. Critical areas are the top and bottom. The wrap should start about 10-15cm below the top deck of the pallet, anchoring to the pallet itself, and extend all the way up and over the top, finishing on the opposite side. This creates a "cap" that prevents the top sacks from being pulled upwards during handling or from moisture dripping inside.
For extra security, especially for very tall or heavy pallets, use strapping. Two steel or plastic straps placed around the entire load (one near the bottom, one near the top) after wrapping provide a fail-safe. Additionally, consider corner boards (heavy cardboard or plastic L-shaped pieces) on the pallet's vertical corners before wrapping. These protect the sacks from being cut by straps and help maintain a squared shape.
What is the Correct Procedure for Stretch Wrapping a Coffee Pallet?
Here is the step-by-step best practice:
- Anchor Start: Fix the end of the stretch wrap film to the pallet base, not to the coffee sacks.
- Spiral Upward: Walk or use a rotating turntable to spiral the wrap around the load with high tension. Maintain a 50% overlap. Ensure the film contacts the pallet base on every rotation at the bottom.
- Cover the Top: Once at the top, continue wrapping over the top of the load in a full circle to create a cap.
- Spiral Downward: Continue spiraling back down to the base, again with 50% overlap.
- Anchor Finish: Cut and seal the film end securely to the pallet base.
- Final Check: The wrap should be tight and conform to the shape of the load. There should be no loose flaps or tunnels.
A properly wrapped pallet should feel like a solid block. You should not be able to easily move an individual sack by pushing on the wrap.
When Should You Use Dunnage, Strapping, or Corner Boards?
- Dunnage (Air Bags/Inflatable Bags): Used inside the container, not on the pallet. Once pallets are loaded into the container, empty space in the door area or between rows must be filled to prevent last-minute shifting during transit. Inflatable dunnage bags are perfect for this. They are placed in the gap and inflated to create a tight fit.
- Strapping: Use on the pallet for loads over 1.5m tall or if the coffee is very valuable. It's an extra layer of security. Always apply over the stretch wrap.
- Corner Boards: Highly recommended for all pallets. They cost very little but prevent strap damage and reinforce the stack's edges, which are vulnerable during forklift handling. They are a mark of a meticulous loader.
A Shanghai Fumao shipment always includes corner boards and proper stretch wrapping as standard. For FCL orders, we manage the dunnage placement inside the container as part of our service.
How to Plan the Overall Container Load for Maximum Efficiency?
You've built perfect pallets. Now you must pack the container like a 3D tetris game. The standard 20ft container can typically hold 10 standard 1200x1000mm pallets, loaded in 2 rows of 5. A 40ft container holds 20-22 pallets.
The loading sequence matters. Heavier pallets should be placed on the bottom if stacking is possible (though for coffee, we rarely stack pallets due to weight). More critically, weight must be distributed evenly across the container floor to avoid stress points. The load should be tight and flush from side to side and front to back. Any gap is an invitation for movement.
You must create a container loading plan (or stowage plan). This simple diagram shows the position of every pallet in the container. It's used by the loading crew and is often required by the freight forwarder. It ensures the planned configuration is executed correctly. The final step is dunnage placement in any remaining head space or door space to lock everything in place.
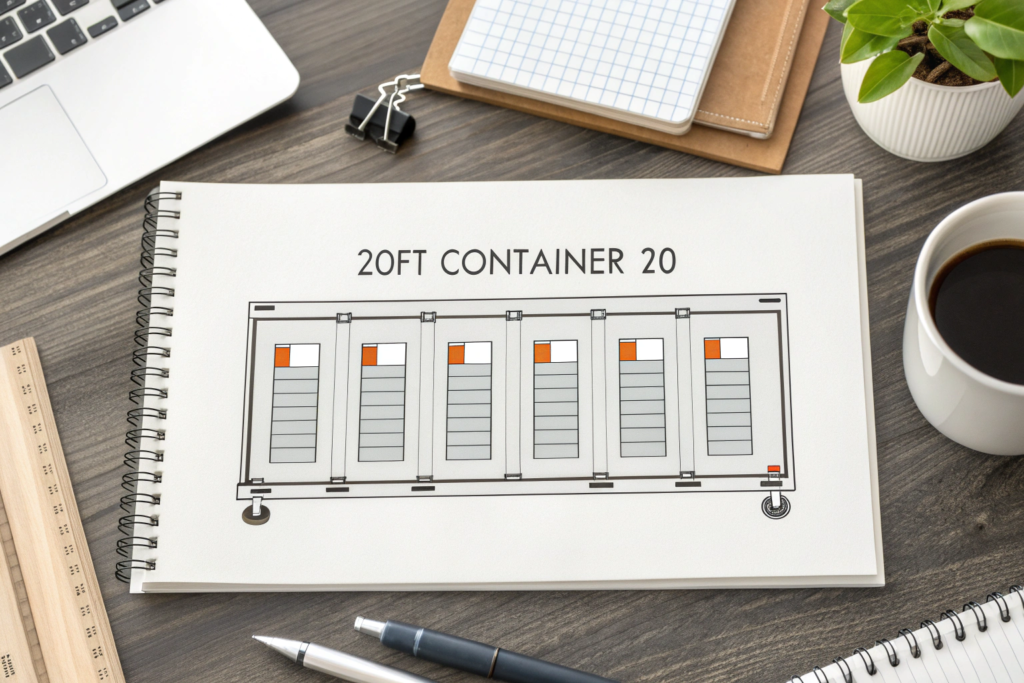
How to Create a Container Stowage Plan for Coffee Pallets?
A stowage plan is simple but vital. For a standard 10-pallet load in a 20ft container:
- Draw a rectangle representing the container floor (5.9m x 2.35m).
- Draw the positions of the 10 pallets: two rows (Row A and Row B), each with 5 pallets (Positions 1-5).
- Label each pallet position with its unique identification (e.g., Lot number, weight).
- Note the total weight of each row and the total container weight.
- Specify any special instructions (e.g., "Pallets with corner boards," "This side up").
This plan is shared with the warehouse and the buyer. It eliminates confusion and provides a checklist to verify the load was built correctly.
What Are Common Mistakes That Lead to Wasted Space or Damage?
Avoid these costly errors:
- Mixing Pallet Sizes: Using different pallet footprints in one container guarantees wasted space.
- Ignoring Weight Limits: Overloading a pallet beyond the bottom sack's strength leads to burst bags.
- Poor Wrapping: Insufficient tension or coverage allows the load to loosen.
- No Interlocking: Using simple column stacking, which is unstable.
- Skipping the Load Plan: Leading to disorganized loading and unused space.
- Forgetting Dunnage: Not securing the final gap in the container door.
Optimizing pallet configuration is a blend of geometry, physics, and disciplined procedure. It's a tangible way to reduce costs and guarantee your product arrives safely. For our clients, this behind-the-scenes expertise is part of what makes Shanghai Fumao a stable coffee supplier—we handle the complex logistics so you receive your coffee intact and on time.
Conclusion
Optimizing pallet configurations for coffee sacks is a precise engineering task with direct financial and quality implications. It requires starting with the right ISO-standard pallets (1200mm x 1000mm), calculating the most efficient and stable interlocking sack pattern per layer, and then securing the entire unit with professional-grade stretch wrapping and corner protection. This meticulous approach at the pallet level must then be scaled up to a carefully planned container stowage plan, utilizing dunnage to eliminate any movement during transit.
Mastering this process minimizes shipping costs per kilogram, maximizes container utilization, and, most importantly, ensures your green coffee arrives at its destination in the same perfect condition it left the origin warehouse. It turns logistics from a cost center into a competitive advantage, protecting your investment and your reputation for reliability.
If you are seeking a coffee exporter that has systematized this optimization to ensure secure, cost-effective shipments, let us demonstrate our process. We can provide our standard palletization specifications and loading plans for your review. Contact our logistics manager, Cathy Cai, to discuss how we can configure your next shipment for maximum efficiency and safety. Email her at cathy@beanofcoffee.com.