You're drinking a cup of mediocre store-bought coffee, wondering what all the fuss about "fresh roast" is about. Then it hits you—what if you could roast your own? The idea seems intimidating, like something only professionals with giant machines can do. But what if you could start with a simple pan on your stove? The truth is, the journey to incredibly flavorful coffee is closer than you think.
Roasting coffee at home is the process of applying heat to green coffee beans to trigger chemical changes that develop their flavor and aroma. For beginners, the simplest methods involve using a heavy pan on the stovetop, a hot air popcorn popper, or a dedicated home coffee roaster. The key is to apply consistent heat and listen for "first crack"—the audible sign that roasting is underway.
So, how do you transform hard, grassy-smelling green beans into fragrant, drinkable coffee with just basic equipment? It's about understanding a simple process and learning to trust your senses. Let's walk through your first roast, step by step.
What Equipment Do You Really Need to Start?
You don't need a $2,000 roaster for your first batch. In fact, you probably already own the most common beginner tool. The barrier to entry is surprisingly low, which is what makes home roasting so addictive.
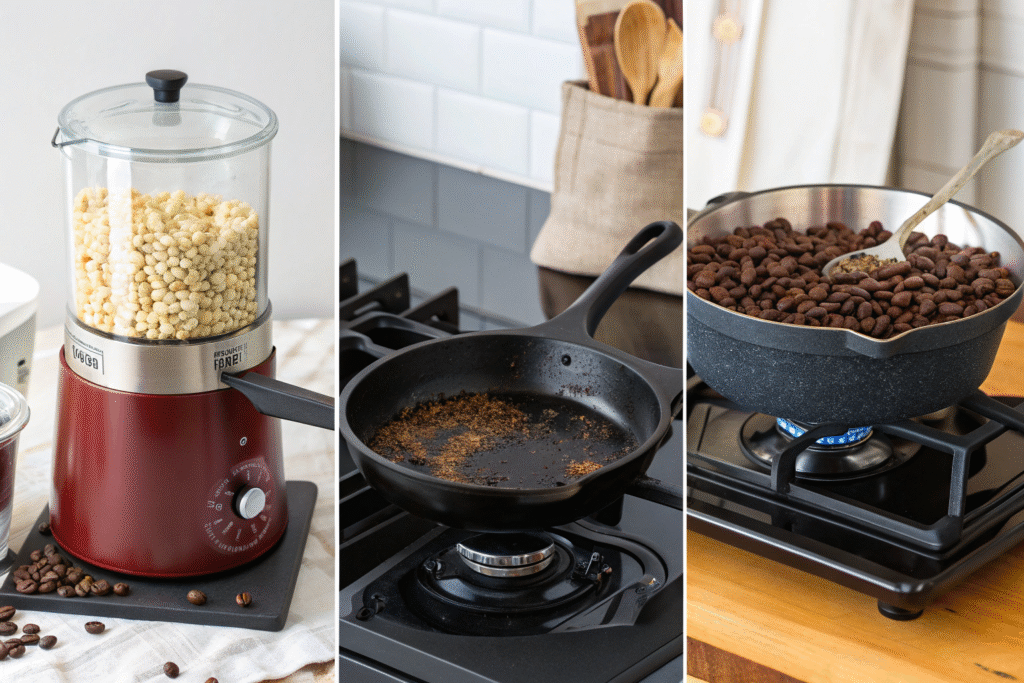
The most accessible methods for beginners are a stovetop pan, a hot air popcorn popper, or a simple dedicated home roaster like a FreshRoast SR. Each has a different learning curve and capacity, but all can produce excellent coffee.
Can You Really Use a Popcorn Popper?
Yes, and it's a legendary method in the home roasting community. A hot air popcorn popper works almost exactly like a professional fluid bed roaster. It uses hot air to circulate and roast the beans evenly. The key is to use an older model with side vents (not a mesh-bottom "butterfly" style). It's cheap, fast, and gives you a clear view of the beans. This method teaches you the importance of consistent air flow.
What's the Best Pan for Stovetop Roasting?
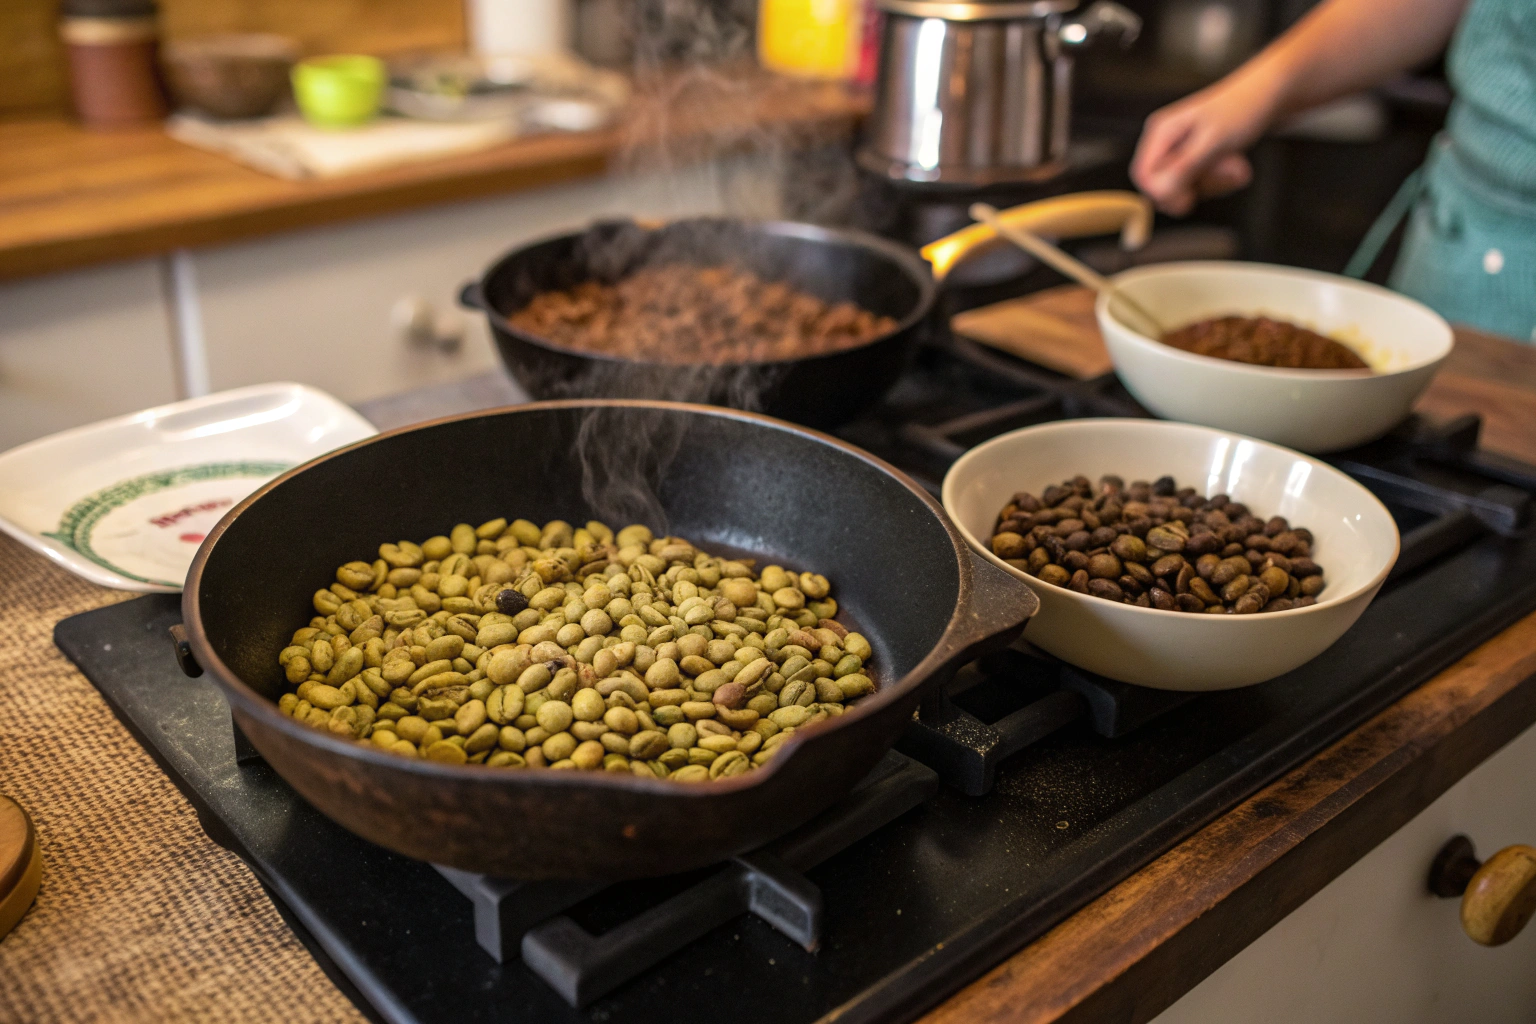
A heavy-bottomed skillet is your best friend here—cast iron or thick stainless steel. Avoid non-stick coatings, as you'll be using high heat. You'll also need a metal colander for cooling and a sturdy wooden spoon or whisk for constant stirring. The stovetop method is hands-on and visceral; you see, hear, and smell every change. It’s the best way to build an intuitive understanding of the roasting process.
What Are the Visual and Audible Stages of Roasting?
Roasting isn't a mystery; it's a sequence of physical changes. If you know what to watch and listen for, you can guide your beans to perfection. Your eyes and ears are your most important tools.
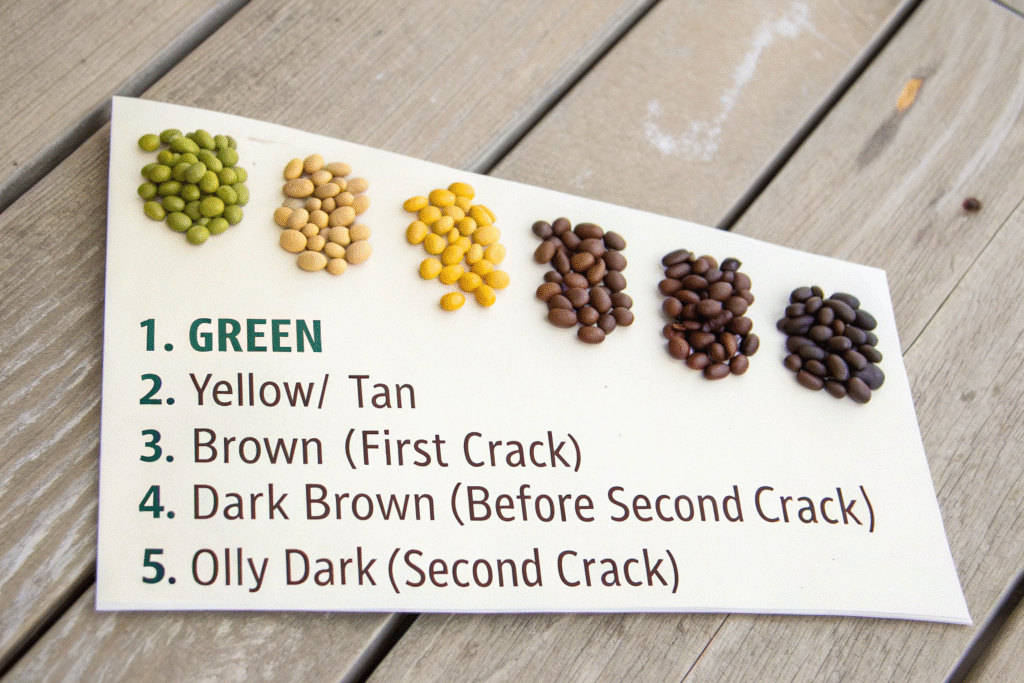
The beans will go through distinct color changes from green to yellow to brown, and you'll hear one or two distinct "cracking" sounds. First Crack is your signal that the bean is developing and is the most important milestone for a beginner to recognize.
What Happens During "First Crack"?
After a few minutes of heating, the beans will make a popping or cracking sound, similar to popcorn but quieter. This is First Crack. Moisture inside the bean is turning to steam and escaping, causing the bean to expand and its structure to break down. At this point, the bean is at a City/City+ roast—a light to medium roast that is fully drinkable and highlights the bean's origin character. This is the moment you truly become a coffee roaster.
How Do You Know When to Stop?
Your stopping point depends on your taste. For a light roast, stop 30-60 seconds after First Crack ends. For a medium roast, continue until the beans are a milk chocolate color and just before you hear the fainter, faster Second Crack. For a dark roast, continue into Second Crack, where the beans will start getting oily. As a beginner, aim for the end of First Crack. It’s a safe, flavorful target. This decision point is all about developing your personal taste preference.
What is a Simple Step-by-Step Process for a First Roast?
Let's make this practical. Here is a fail-safe guide for your very first stovetop roast. Follow these steps, and you'll have drinkable, homemade coffee in under 20 minutes.
The basic process involves preheating your pan, adding beans, agitating constantly, listening for first crack, cooling quickly, and waiting before brewing. Patience and constant motion are the secrets to success.
What Are the Steps for a Stovetop Roast?
- Prep: Work in a well-ventilated area. Have your colander ready. Measure 1/2 to 1 cup of green beans.
- Heat: Preheat your pan on medium-high heat.
- Roast: Add beans. Start stirring immediately and don't stop.
- Listen & Watch: After 4-8 minutes, you'll hear First Crack. The beans will smell like baking bread and look cinnamon-brown.
- Finish: For a light roast, stop 45 seconds after First Crack starts to slow. Pour beans into the colander.
- Cool: Shake and stir the beans in the colander for several minutes until they are room temperature. This stops the roasting process.
This hands-on method is the best way to build an instinct for the process. Your first roast might be uneven, but it will be yours.
Why Must You Wait Before Brewing?
This is the hardest part! Freshly roasted beans need to degas. They release CO2 for 12-24 hours (and up to 5 days for darker roasts). If you brew immediately, the CO2 will repel water, resulting in a sour, under-extracted cup. Waiting at least 8-12 hours allows the flavors to settle and develop, giving you a much smoother, more balanced brew. This degassing period is non-negotiable for good coffee.

How Do You Store and Brew Your Home Roasts?
Your beautiful, freshly roasted beans are fragile. How you store and brew them protects the incredible flavor you just worked so hard to create.
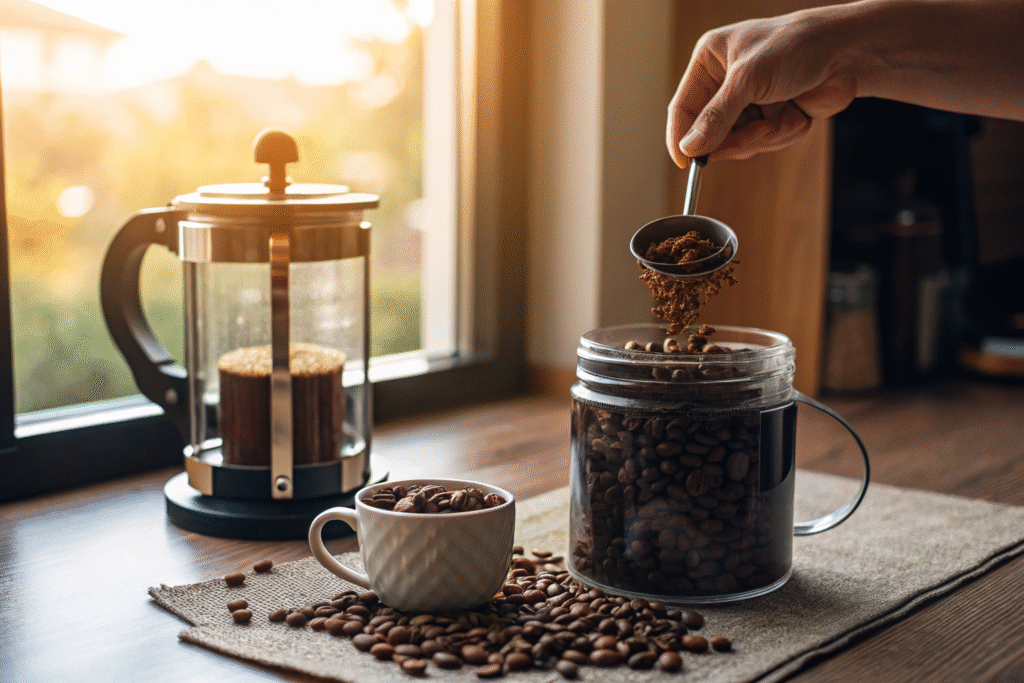
Store your cooled beans in an airtight container at room temperature, away from light, heat, and moisture. Avoid the freezer or fridge, as they can cause condensation and flavor loss. For brewing, a simple method like a Pour-Over or French Press is ideal for tasting the nuances of your roast.
What is the Best Container for Storage?
An opaque, airtight ceramic or glass jar with a rubber seal is perfect. A simple mason jar in a cupboard works well too. The goal is to limit exposure to oxygen, which is the enemy of freshness. Your home-roasted coffee will be at its peak for about 1-2 weeks. This short shelf life is actually a good thing—it means the beans are fresh and full of volatile aromatics.
What Brewing Method is Most Forgiving?
For your first few batches, use a French Press. It's a full-immersion method that is very forgiving of any slight inconsistencies in your roast. It will produce a rich, full-bodied cup that lets you taste the fundamental flavors you created. As you get more consistent, try a Pour-Over to taste more clarity and acidity. This journey from roaster to brewer is the final, rewarding step in the home coffee cycle.
Conclusion
Roasting coffee at home is a rewarding skill that demystifies coffee and puts you in complete control of your daily cup. It starts with simple equipment, a willingness to learn from your senses, and the patience to listen for the all-important first crack.
Your first roast doesn't have to be perfect—it just has to be yours. The journey from green, grassy beans to a fragrant, custom roast is one of the most satisfying experiences in the world of coffee. And the best part? It only gets better from here. To begin your home roasting adventure, you need a source for high-quality green beans. We at BeanofCoffee supply premium green coffee beans perfect for home roasters. Contact us at cathy@beanofcoffee.com to order a sample pack of our Yunnan Arabica and start roasting today.