Let me ask you something. Have you ever brewed a cup of coffee that should have been perfect, but it tasted... weak? Or maybe it was too bitter, even though you used the same beans and water as yesterday. I have been there. And for a long time, I did not know why. Then I learned about agitation. Honestly, it changed how I think about brewing. It is not just about the beans. It is about how you move the water.
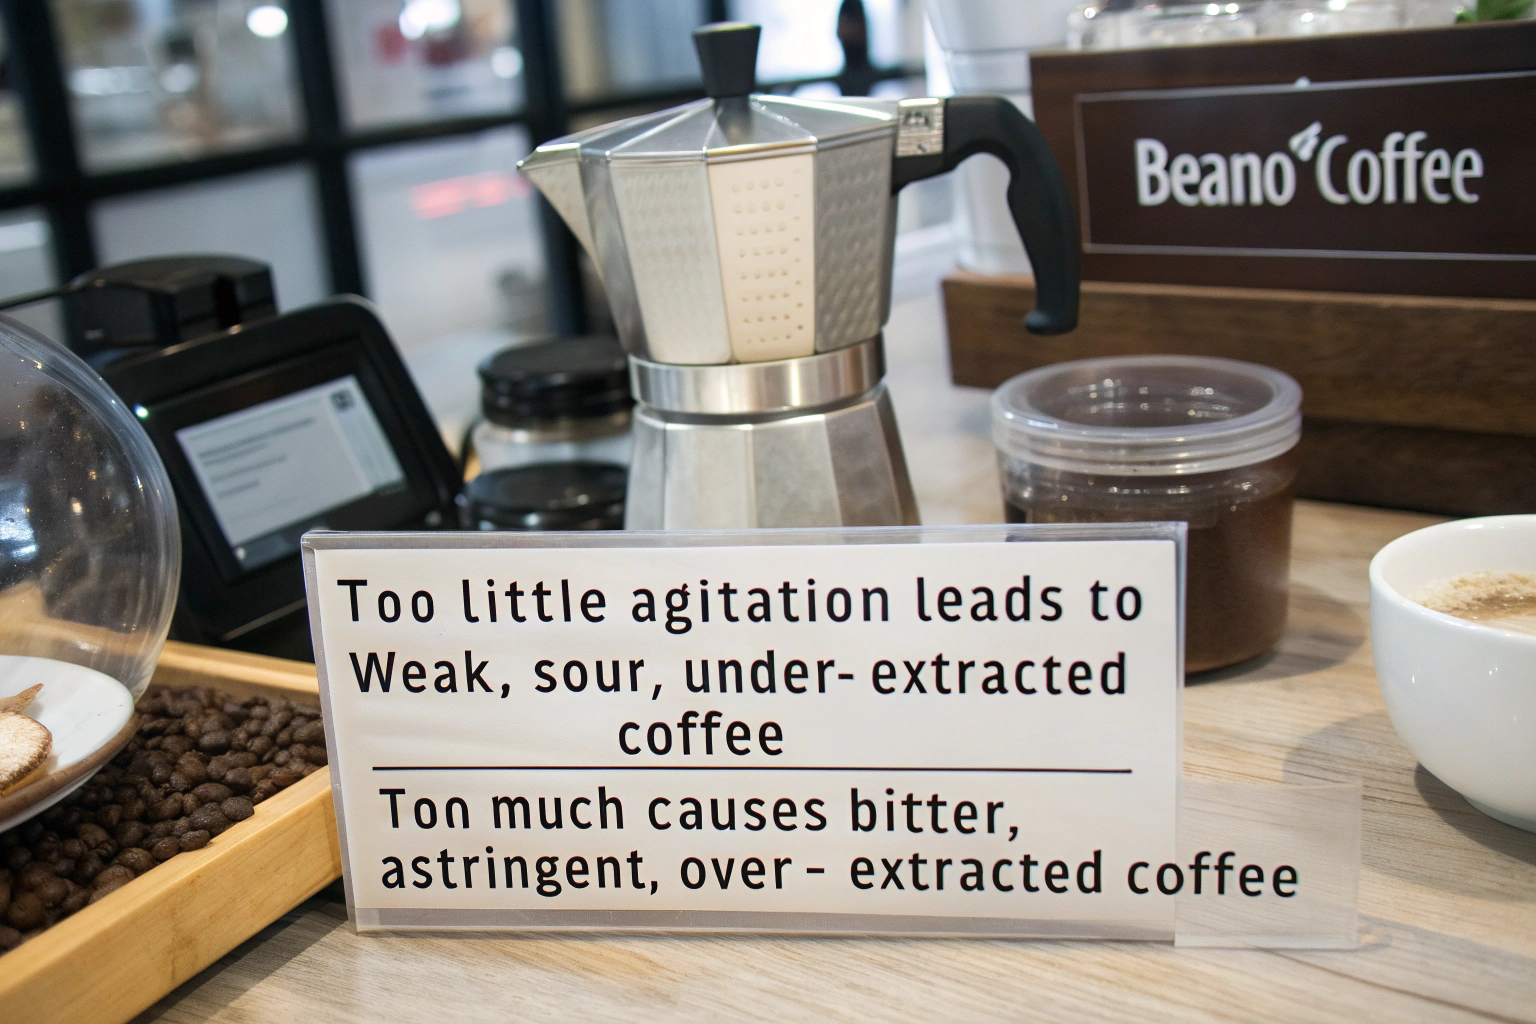
Agitation is the movement of water and coffee grounds during brewing. It increases extraction by bringing fresh water into contact with the coffee particles more often. Too little agitation gives weak, sour, under-extracted coffee. Too much agitation gives bitter, astringent, over-extracted coffee. Understanding agitation helps you control flavor, consistency, and brew time. At Shanghai Fumao, we teach our buyers how to adjust agitation for different beans, from our dense Yunnan Arabica to our softer Catimor.
Now, I am a farmer, not a barista. But I have spent years testing how our beans behave in different brewers. I have talked to roasters and café owners who use our coffee. And I have learned that agitation is one of the most overlooked variables. So let me break it down for you. Once you understand this, your coffee will taste better. And you will waste fewer beans.
What Is Agitation and Why Does It Matter?
Let me start with a simple definition. Agitation is any movement that mixes water and coffee grounds. This can be stirring with a spoon, pouring water from a height, or even swirling the brewer. It sounds simple. But it has a huge impact on flavor. I learned this when I brewed the same coffee two ways. One with stirring. One without. They tasted like different beans.
Agitation matters because it increases the extraction rate. When you stir or pour aggressively, you remove the thin layer of saturated coffee that forms around each ground. This allows fresh water to reach the inside of the ground faster. More extraction means more flavor compounds in your cup—both good and bad. So agitation gives you control. You can use it to push extraction higher or lower depending on your taste.
Let me give you an analogy. Think of coffee grounds like a tea bag. If you drop a tea bag into hot water and leave it alone, it takes 5 minutes to make weak tea. If you dunk the tea bag up and down, it makes strong tea in 2 minutes. Same water. Same tea bag. Different agitation.
Coffee works the same way. The water wants to dissolve the coffee solids. But as soon as the water touches the coffee, it becomes saturated. It cannot hold more flavor. So you need to move it away and bring fresh water in. That is agitation.
So, what does this mean for your cup? Here is a simple table:
| Agitation Level | Extraction Speed | Flavor Result | Common Brew Method |
|---|---|---|---|
| None (still) | Very slow | Weak, sour, under-extracted | Immersion (no stir) |
| Low (gentle pour) | Slow | Clean, balanced, sweet | Pour-over (gooseneck) |
| Medium (stirring) | Medium | Full, rich, complex | French press, Aeropress |
| High (vigorous stir) | Fast | Bitter, harsh, over-extracted | Cupping (aggressive stir) |
So agitation is a tool. You can use it to fix under-extracted coffee. Or you can reduce it to fix over-extracted coffee.
How does agitation affect different brew methods?
Let me walk you through the most common methods.
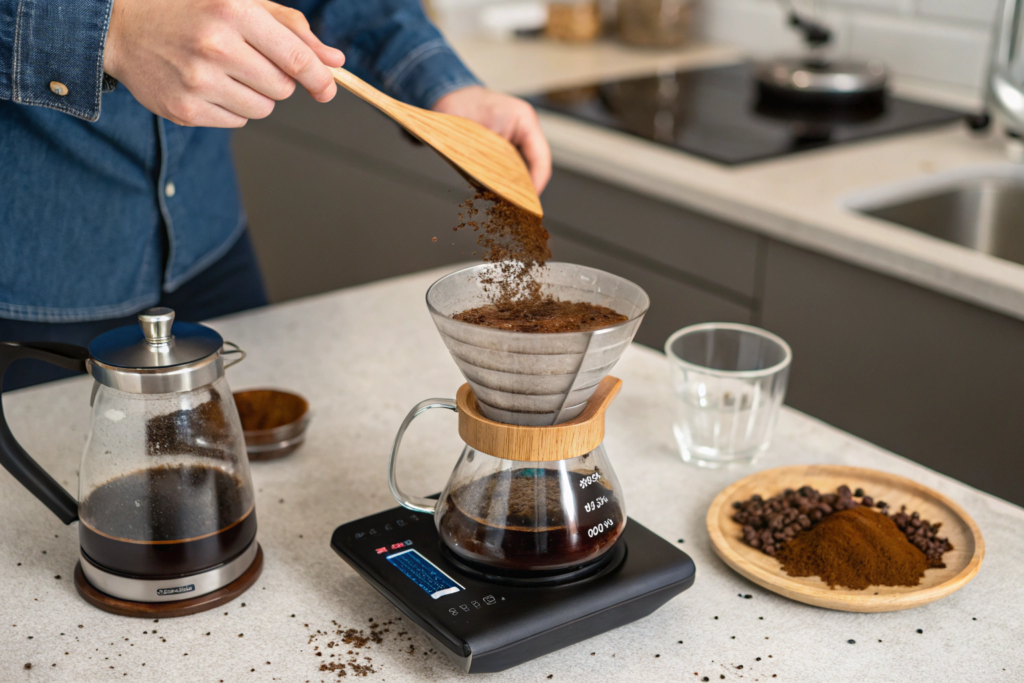
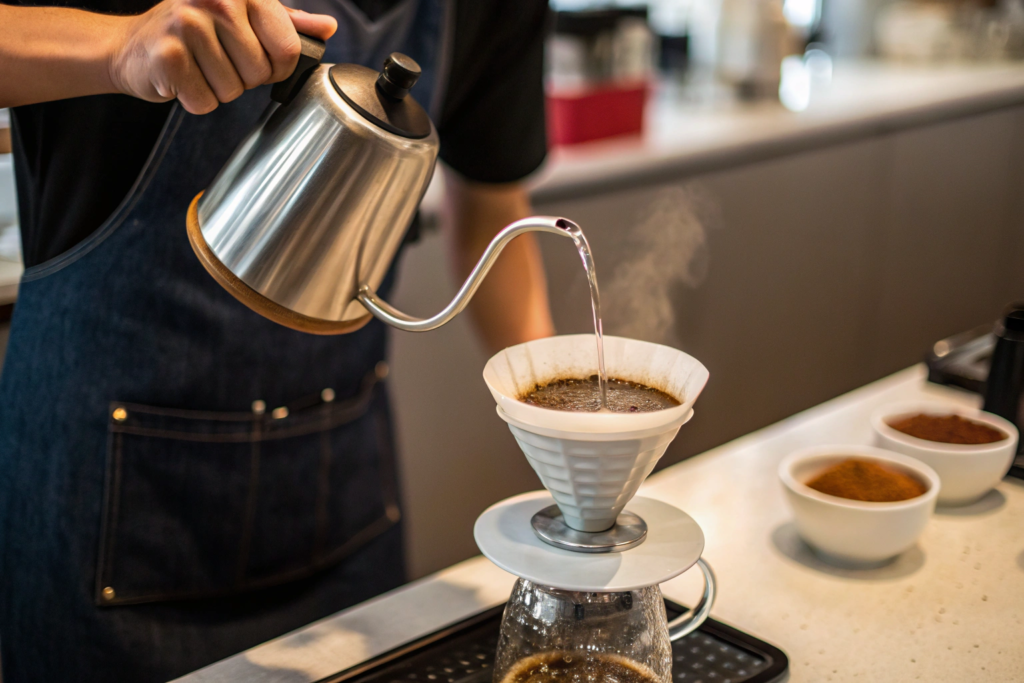
Pour-over (V60, Chemex, Kalita): The pour itself creates agitation. A high, fast pour creates more agitation. A low, slow pour (gooseneck kettle) creates less. Most experts recommend a medium pour height. Then add one gentle stir or swirl after pouring.
French press: This is immersion brewing. Without agitation, the coffee sits on top of the water. That gives weak extraction. So you should stir right after adding water. Then stir again at 4 minutes before pressing.
Aeropress: You have two options. Standard method (stir for 10 seconds) gives medium agitation. Inverted method with aggressive stirring gives high agitation and stronger extraction.
Espresso: Water pressure creates extreme agitation. That is why espresso extracts so fast (25–30 seconds). You do not need to stir. The machine does it for you.
Cold brew: No heat means extraction is slow. But agitation still helps. Stirring the grounds at the start of a cold brew can reduce brew time by 2–4 hours.
We test all of these methods on our farm. We use our Arabica and Catimor. And we share the results with our buyers. For more details, check out this brew agitation guide from the SCA.
What is the science behind agitation?
Let me keep it simple. Coffee has about 2,000 flavor compounds. Some dissolve quickly (acids, sugars). Some dissolve slowly (bitter compounds, oils).
When you add water, the quick-dissolving compounds come out first. They surround the coffee ground. That saturated layer stops more extraction.
Agitation breaks that layer. It sweeps away the saturated water. It brings fresh water to the ground. So more compounds come out.
But here is the catch. Agitation does not choose which compounds to extract. It pulls out everything. So if you agitate too much, you get the bad compounds too (bitter, astringent).
The goal is to agitate just enough to get the good stuff, but not so much that you get the bad stuff.
We use a tool called a refractometer to measure extraction. It gives a number called TDS (Total Dissolved Solids). For balanced coffee, TDS should be between 1.15% and 1.35%. Agitation moves this number up or down.
For a deeper dive, read this extraction science paper.
How Does Agitation Change with Different Coffee Beans?
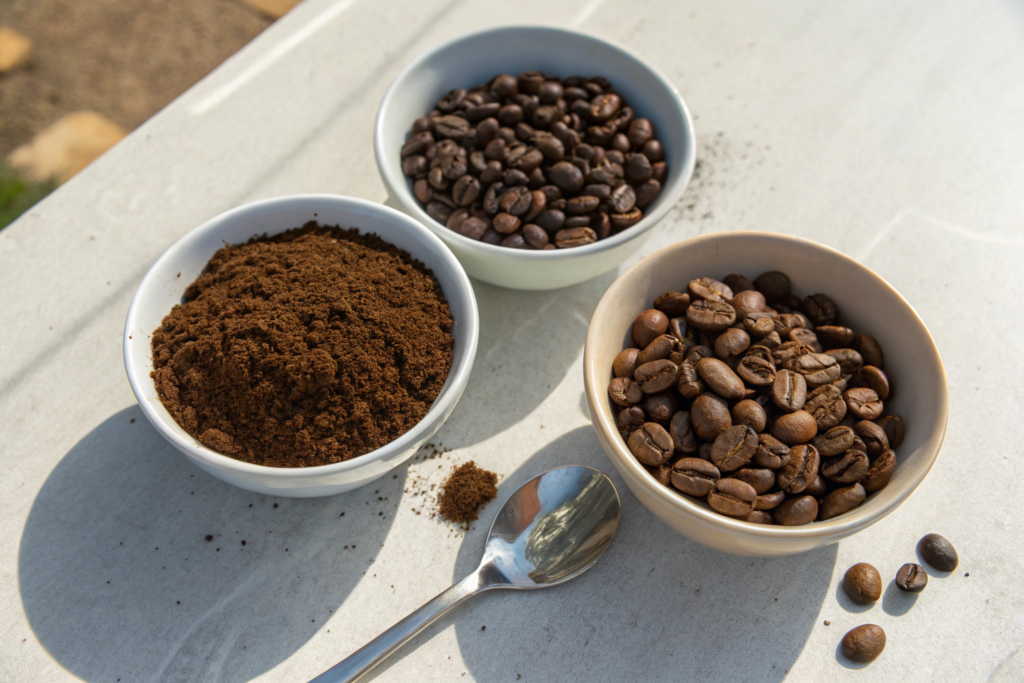
Here is something I learned from testing our own beans. Not all coffee responds to agitation the same way. Dense beans need more agitation. Soft beans need less. If you treat them the same, you get inconsistent results. So you need to adjust your technique based on the bean you are using.
Dense, hard beans (like high-altitude Arabica) resist extraction. They need more agitation to release their flavors. Soft, porous beans (like low-altitude Robusta or some Catimor) extract easily. They need less agitation to avoid bitterness. At BeanofCoffee, our Yunnan Arabica grows at 1,500 meters. It is very dense. We recommend medium to high agitation for these beans. Our Catimor grows lower and is softer. We recommend low to medium agitation.
Let me explain why density matters. Coffee density comes from altitude. High-altitude beans grow slowly. They become hard and dense. Low-altitude beans grow fast. They are softer and more porous.
When you add water, soft beans absorb water quickly. They swell. The inside gets wet fast. So extraction happens easily. Too much agitation will over-extract them.
Hard beans resist water. The water takes time to get inside. So you need agitation to push water into the bean and pull flavors out.
Here is a table based on our beans:
| Bean Type | Altitude (masl) | Density (g/mL) | Recommended Agitation |
|---|---|---|---|
| Yunnan Arabica | 1,400–1,600 | 0.68–0.72 | Medium to high |
| Catimor (washed) | 1,000–1,200 | 0.62–0.66 | Low to medium |
| Catimor (natural) | 1,000–1,200 | 0.60–0.64 | Low |
| Robusta (washed) | 600–800 | 0.58–0.62 | Very low |
So if you buy our Arabica, stir it. Use a gooseneck kettle with a faster pour. Swirl the brewer. If you buy our Catimor, be gentle. Pour slowly. Do not stir too much.
How to adjust agitation for roast level?
Roast level also changes how beans react to agitation. Dark roasts are more brittle. They break easily. When they break, they create fine particles (fines). Those fines extract very fast and can cause bitterness.
So for dark roasts, use less agitation. For light roasts, use more agitation.
Here is a simple rule:
- Light roast: Dense, hard. Needs medium to high agitation.
- Medium roast: Balanced. Needs medium agitation.
- Dark roast: Brittle, soft. Needs low to medium agitation.
We tested this with our medium-dark roast Catimor. It is popular in Europe. We found that too much agitation made it taste ashy. So we told our buyers: "Pour gently. Stir once. Then leave it alone."
One of our buyers in Italy ignored this. He stirred aggressively. His espresso tasted burnt. He switched to our method. The problem went away.
For more on roast and agitation, check this guide from Perfect Daily Grind.
How does BeanofCoffee test agitation with its beans?
We have a small lab on our farm. We use it to test different brew methods. Here is our standard test:
We take one lot of beans (same harvest, same roast). We brew it three ways:
- No agitation – Pour water gently. No stir. No swirl.
- Medium agitation – Pour from 4 inches. Stir for 5 seconds.
- High agitation – Pour from 12 inches. Stir for 15 seconds. Swirl the brewer.
Then we measure TDS with a refractometer. We also taste the coffee.
For our Arabica, the no-agitation cup scored 78 (weak). The medium agitation scored 85 (balanced). The high agitation scored 82 (slightly bitter). So medium was best.
For our Catimor, no agitation scored 80 (okay). Medium agitation scored 84 (good). High agitation scored 76 (bad). So less agitation was better.
We share these results with our buyers. We also work with Shanghai Fumao to send brew guides with every sample. The guide includes agitation tips for each bean.
What Are the Signs of Too Much or Too Little Agitation?
You do not need a lab to know if your agitation is wrong. Your tongue will tell you. But you need to know what to look for. I have tasted thousands of cups of coffee. And I can tell within one sip if the agitation was off. Let me teach you the signs.
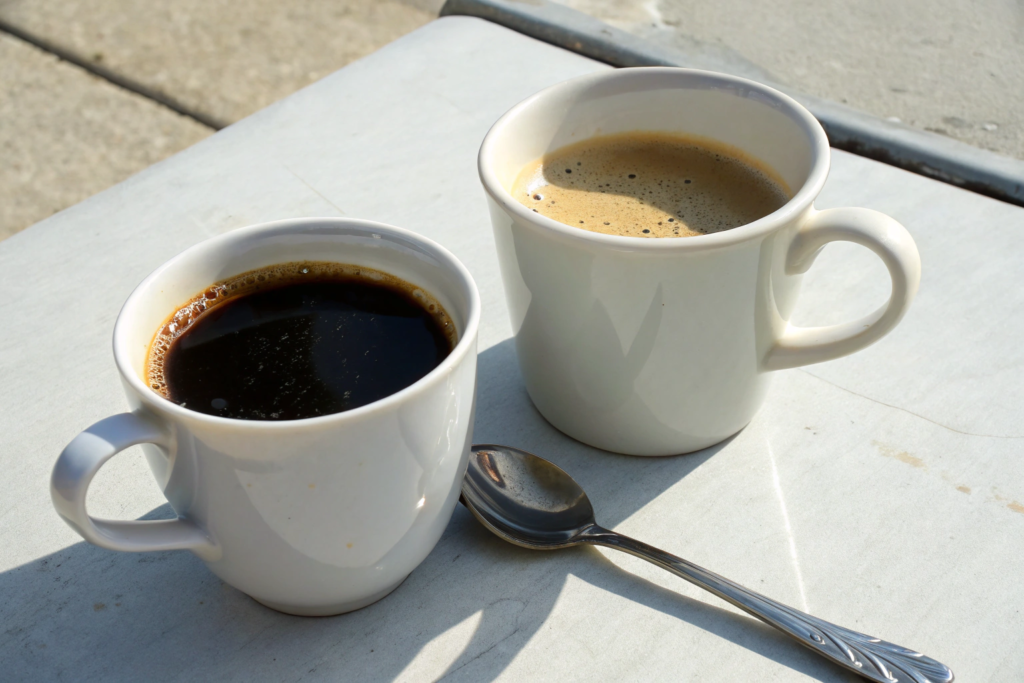
Too much agitation gives over-extracted coffee: bitter, drying, astringent, and hollow. It feels rough on your tongue. Too little agitation gives under-extracted coffee: sour, salty, weak, and empty. It tastes like sour water. The right amount of agitation gives balanced coffee: sweet, complex, smooth, with a clean finish. You can fix both problems by changing your pouring or stirring technique next time.
Let me give you a checklist. Taste your coffee. Then ask these questions.
Signs of too much agitation (over-extraction):
- Bitterness like dark chocolate that does not go away
- Astringency (dry feeling on your tongue, like unripe banana)
- Hollow or empty finish (flavors disappear quickly)
- Harshness that makes you cough
Signs of too little agitation (under-extraction):
- Sourness like lemon or vinegar
- Saltiness (yes, coffee can taste salty)
- Weak body (like tea or flavored water)
- Quick finish (flavors disappear in 2 seconds)
Signs of correct agitation (balanced extraction):
- Sweetness like honey or brown sugar
- Brightness like apple or berry (not sour)
- Smooth body like whole milk
- Long, clean finish (flavors stay for 10–15 seconds)
If you taste bitterness or astringency, reduce agitation next time. Pour slower. Stir less. Do not swirl.
If you taste sourness or weakness, increase agitation. Pour faster from a higher height. Stir more. Swirl the brewer.
How to fix agitation problems during brewing?
You cannot fix a bad cup after it is brewed. But you can fix your next cup. Here is a simple troubleshooting table:
| Problem | Likely Cause | Fix for Next Brew |
|---|---|---|
| Sour, weak | Too little agitation | Pour from 6 inches higher. Stir for 5 more seconds. |
| Bitter, harsh | Too much agitation | Pour closer to the grounds. Stir only once gently. |
| Sour and bitter (mixed) | Uneven agitation | Stir more consistently. Use a circular pour. |
| Hollow finish | Channeling (water found a path) | Stir to break up clumps. Pour evenly. |
I had a buyer in Seattle who could not fix his sour coffee. He used our Arabica. He tried everything. Then he sent me a video. I saw that he was not stirring at all. He just poured water and walked away. I told him: "Stir for 10 seconds." He did. The sourness went away.
Sometimes the fix is that simple.
For a visual guide, watch this agitation troubleshooting video from a professional barista.
What tools measure agitation?
You do not need tools. Your taste buds are enough. But if you want to be scientific, here are two tools:
Refractometer: Measures TDS (Total Dissolved Solids). Cost $150–$300. It tells you if you extracted too much or too little. The ideal range is 1.15–1.35% TDS.
Flow rate meter: Measures how fast you pour. Expensive. Only for labs. But you can practice pouring from a kettle into a cup on a scale. Time how long it takes to pour 250ml. A slow pour is 30–40 seconds. A fast pour is 10–15 seconds.
We use a refractometer on our farm. We test every batch of beans. We also test different agitation levels. Then we share the ideal TDS range with our buyers.
If you want to buy a refractometer, check the VST Labs refractometer. It is the industry standard.
How Can You Control Agitation at Home or in a Café?
Agitation sounds technical. But you can control it with simple changes. You do not need expensive equipment. You just need to pay attention to how you pour and stir. I have trained my own workers on our farm to control agitation. Now let me teach you.
You can control agitation by adjusting your pour height, pour speed, stir frequency, and stir intensity. A gooseneck kettle gives you the most control. Pour from 1–2 inches for low agitation. Pour from 4–6 inches for medium agitation. Pour from 8–12 inches for high agitation. Stir with a spoon or a chopstick. One gentle swirl is low agitation. Ten aggressive stirs is high agitation.
Let me give you specific techniques for each brew method.
For pour-over (V60, Chemex):
- Low agitation: Use a gooseneck kettle. Pour from 1 inch above the grounds. Pour in small circles. Do not stir.
- Medium agitation: Pour from 4 inches. Pour in fast circles. Stir once with a spoon after pouring.
- High agitation: Pour from 8 inches. Pour aggressively in a straight line. Stir three times. Swirl the brewer.
For French press:
- Low agitation: Add water. Do not stir. Wait 4 minutes. Press gently.
- Medium agitation: Add water. Stir once. Wait 4 minutes. Stir again. Press.
- High agitation: Add water. Stir vigorously for 10 seconds. Wait 4 minutes. Stir again. Press hard.
For Aeropress:
- Low agitation: Add water. Stir 3 times gently. Press slowly.
- Medium agitation: Add water. Stir 10 times. Press normally.
- High agitation: Add water. Stir 20 times aggressively. Press fast.
For cupping (quality testing):
- Standard: Add water. Wait 4 minutes. Break the crust with two spoons. Stir three times. This is medium-high agitation.
We use the cupping method to test our beans. It is consistent. That is why it is the industry standard.
What is the best kettle for agitation control?
A gooseneck kettle. No question. The thin spout lets you control the flow. You can pour high or low. Fast or slow. A regular kettle dumps water. You cannot control it.
Here are our recommendations:
- Budget: Hario Buono ($40–$60). Simple. Works well.
- Mid-range: Fellow Stagg EKG ($150–$200). Has temperature control.
- Professional: Brewista Artisan ($100–$150). Very precise.
We use Hario kettles in our farm lab. They are cheap and reliable.
If you cannot buy a gooseneck kettle, use a measuring cup with a spout. Pour slowly. That is better than nothing.
How does BeanofCoffee train buyers on agitation?
When you buy a sample from us, we send a brew guide. It is one page. It has three sections:
- Bean info: Altitude, density, recommended agitation level.
- Brew steps: Water temperature, grind size, ratio, and agitation technique.
- Troubleshooting: What to change if the coffee tastes sour or bitter.
We also offer video calls. You can brew coffee on your end. We watch and give feedback. Many of our buyers use this service. It is free for container orders.
We work with Shanghai Fumao to include these guides in every shipment. They print the guides and pack them with the samples.
So if you buy from us, you are not just getting beans. You are getting training. Because we want you to succeed. And good agitation is part of that.
Conclusion
Agitation is not complicated. It is just movement. But it has a huge impact on your coffee. Too little movement gives sour, weak coffee. Too much movement gives bitter, harsh coffee. The right amount gives sweet, balanced coffee.
You can control agitation by changing your pour height, pour speed, and how much you stir. Different beans need different agitation. Dense beans like our Yunnan Arabica need more agitation. Soft beans like our Catimor need less. Test your technique. Taste your coffee. Adjust. It is that simple.
At Shanghai Fumao, we help our buyers understand agitation. We send brew guides. We offer video training. We want you to get the best flavor from our beans. If you want to try our beans with the right agitation technique, reach out to us.
Contact Cathy Cai directly. Email: cathy@beanofcoffee.com.Tell her which brewing method you use. She will send you samples, a brew guide, and a video tutorial. From our farm in Yunnan to your cup. With the right agitation.