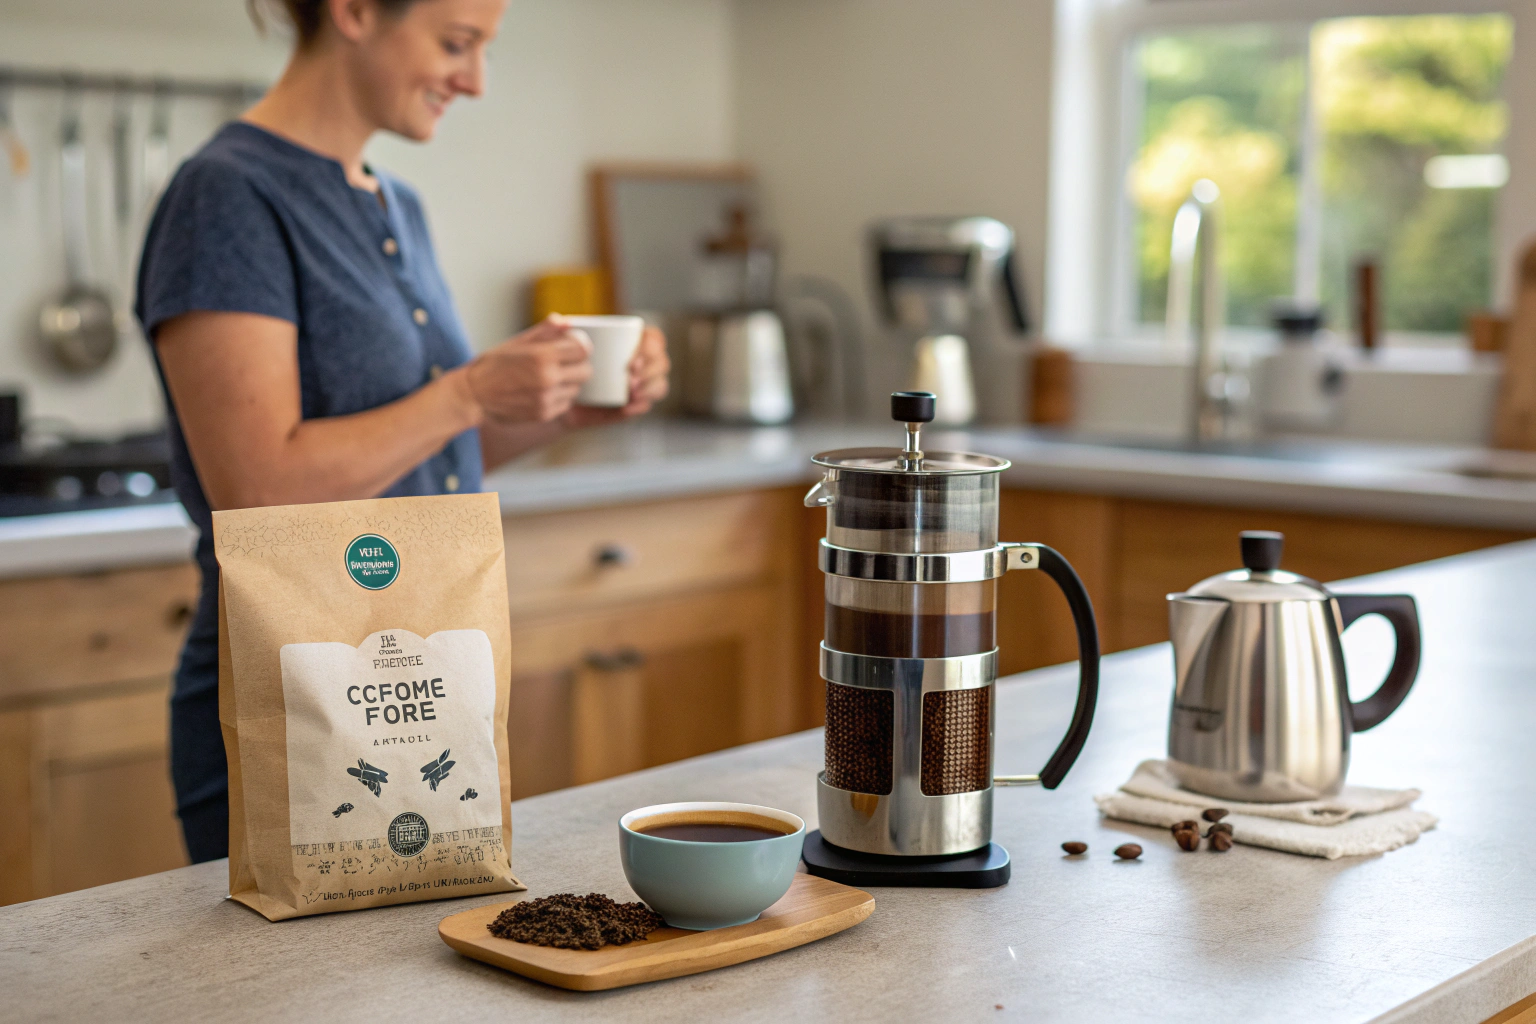
You’ve invested in premium beans—maybe some excellent Yunnan Arabica from us. You have a decent grinder and all the gear. But the cup just doesn’t sing. It tastes bitter, weak, or just… flat. It’s frustrating. Honestly, this happens more than you think, even to coffee shop owners who buy from us. The problem usually isn’t the bean; it’s a small slip in the brewing process that throws everything off.
The most common coffee brewing mistakes revolve around four critical, and often overlooked, factors: incorrect coffee-to-water ratio, using stale or poorly ground coffee, uncontrolled water temperature, and inconsistent extraction time. These aren’t complex secrets; they’re fundamental pillars that, when unbalanced, prevent even the highest-quality beans from expressing their full potential. The good news? Each one is easily correctable with a bit of knowledge and attention.
Think of brewing as a simple formula. If you change one variable, you must adjust another to keep the result balanced. Let’s walk through these common pitfalls—you might recognize one or two—and turn your daily brew from a guessing game into a consistently delicious ritual.
Why is my coffee always too bitter or too sour?
That sharp tang or that harsh, lingering bitterness—they’re two sides of the same coin. You know the feeling. One sip and your face puckers. It’s the most direct feedback your coffee can give you. These flavors aren’t “bad” in essence; in balance, they create complexity. But when they dominate, it’s a clear signal. And that signal is almost always about extraction.
Coffee that is too sour (under-extracted) or too bitter (over-extracted) is primarily a result of incorrect brew time and grind size interacting with water temperature. Sourness means the water hasn’t had enough contact time or wasn’t hot enough to pull out the sweet, balanced sugars and oils. Bitterness means it’s gone too far, pulling out the harsh, undesirable compounds. The grind size is your main control knob here. A finer grind exposes more surface area, leading to faster extraction; a coarser grind does the opposite.

How does grind size directly affect flavor?
Think of grind size as setting the road for the water to travel. A fine grind is like a crowded, complex city street—water gets stuck, interacts with everything, and extracts quickly. If your coffee is bitter, your “streets” are too fine and crowded. The water overworks the grounds. For methods like French press, which have a long contact time (4+ minutes), you need a coarse grind—wide-open highways—so the water doesn’t over-extract. For a quick 30-second espresso shot, you need those fine city streets to get enough flavor fast. An inconsistent grinder creates both fine dust and large boulders, leading to simultaneous under and over-extraction—a muddy, confused cup. Investing in a good burr grinder is the single biggest upgrade you can make, far more important than a fancy machine.
What is the “brew time sweet spot” for different methods?
Time is the other half of the equation. Each brewing method has a guideline range. Stray too far, and the balance tips. For pour-over (like V60 or Chemex), aim for 2.5 to 3.5 minutes total contact time. If it drains in 1:30, it’ll likely be sour and weak—grind finer. If it takes 5 minutes, it’ll be bitter—grind coarser. For French press, 4 minutes is standard. For AeroPress, it’s incredibly versatile—anywhere from 1 to 2.5 minutes depending on your recipe. The key is to use a timer. Don’t guess. Start with the standard time for your method, taste, and then adjust your grind size to hit that target time. It’s a system, not magic. Once you have this locked in, you’ll appreciate the clean, balanced profile of beans from trusted suppliers like Shanghai Fumao.
How important is water quality and temperature really?
We obsess over beans and grinders, but often pour tap water straight from the kettle and wonder why things taste “off.” Water isn’t just a solvent; it’s the vehicle that carries flavor. If your vehicle is dirty or poorly tuned, the journey fails. I learned this the hard way years ago at our tasting lab. We used two different local waters with the same Yunnan Catimor batch—the difference was staggering.
Water quality and temperature are critically important, often accounting for the subtle “flatness” or unpleasant aftertaste in home-brewed coffee. Ideal brewing water should be clean, odor-free, and have a balanced mineral content (not too hard, not too soft). The ideal temperature range is between 195°F and 205°F (90°C to 96°C). Boiling water (212°F/100°C) can scorch grounds, leading to a harsh, bitter taste. Water that’s too cool (<185°F/85°C) fails to properly extract, yielding a sour, weak cup.
![]()
What type of water should I use for brewing?
Avoid distilled or pure reverse osmosis (RO) water. It’s too “empty.” Minerals like magnesium and calcium are essential for pulling flavor compounds out of the coffee grounds. Without them, your coffee will taste hollow and lack sweetness. Similarly, very hard tap water full of limestone can create a chalky, dull flavor and cause scale in your equipment. The best bet? Use filtered water. A simple carbon filter pitcher can remove chlorine and most off-flavors. For the enthusiast, you can buy third-wave water mineral packets or use a mix of 2/3 distilled water and 1/3 good-quality tap water. It’s a small step with a massive return on flavor clarity.
Can I just use water straight from the boil?
No. Let the kettle sit. This is a tiny habit with a huge impact. When you boil water, it’s at 212°F (100°C). Pouring it directly onto coffee can burn it, especially if it’s a fine grind. You want to hit that 195°F-205°F sweet spot. How do you get there without a thermometer? After boiling, simply take the kettle off the heat and let it sit for 30 to 45 seconds. That’s usually enough. If you’re serious, a variable temperature gooseneck kettle is a game-changer for pour-over methods, giving you precise control. Remember, stable temperature ensures even extraction. It’s one less variable to worry about, letting the nuanced notes of a premium bean shine through.
Are you measuring your coffee and water correctly?
“A couple of scoops.” “Fill it up to that line.” This is where the guessing game begins. Inconsistent measuring is the number one reason your coffee tastes great one day and terrible the next. Volume (like using a scoop) is notoriously unreliable because coffee grounds settle differently. A scoop of light-roast beans is heavier than a scoop of dark-roast beans. You’re essentially using a different amount every time.
For truly consistent coffee, you must measure your coffee and water by weight (grams) using a digital scale, not by volume (scoops or cups). The standard starting ratio is 1:16—that’s 1 gram of coffee to 16 grams of water. For a standard 500ml (about 17 oz) brew, you’d use roughly 31 grams of coffee. A small, precise scale that measures to 0.1 grams costs less than a bag of specialty beans and will transform your consistency overnight.
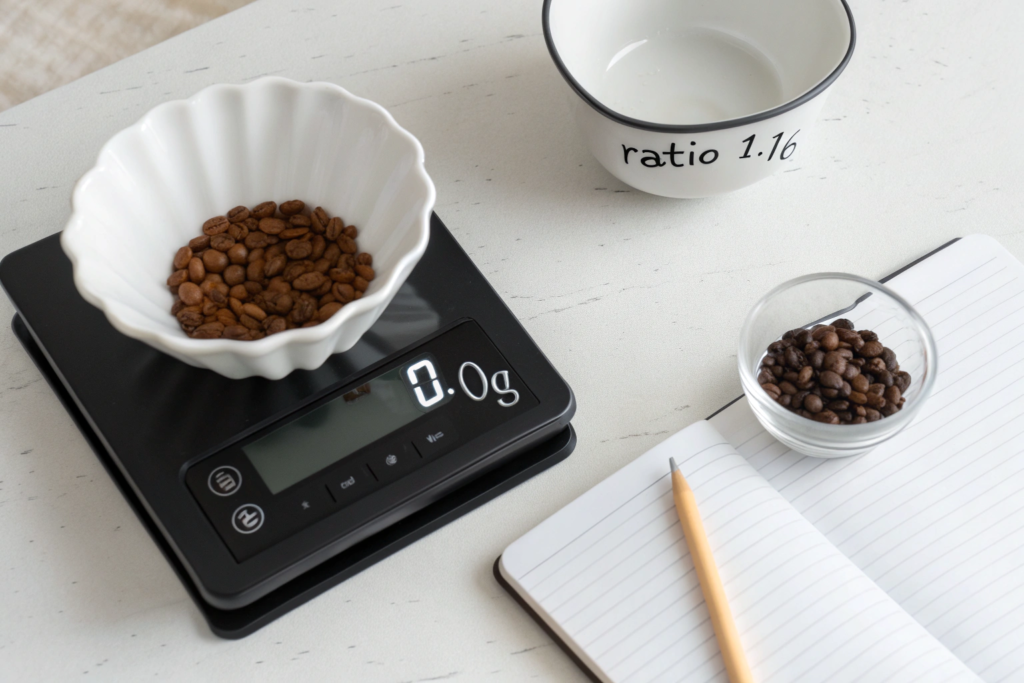
What is the best coffee-to-water ratio to start with?
The 1:16 ratio is the community’s golden middle ground. But it’s just a start. Think of it like this: a stronger, more intense cup (like for milk drinks) might use a 1:15 ratio (more coffee per water). A lighter, more tea-like cup might use 1:17. The Specialty Coffee Association (SCA) recommends a range between 1:15 and 1:18. My advice? Start at 1:16. Brew it. Taste it. If it’s too strong or bitter, try 1:17 next time. If it’s weak or sour, try 1:15. Write it down. This is how you develop your perfect recipe. And when you’re dialing in a new bean—like a vibrant Yunnan Arabica—starting with a precise weight is the only way to fairly judge its true profile.
Why is a scale better than a marked carafe?
Carafes with lines are convenient, but they measure volume (ml of water), not the weight of the coffee input. As we said, coffee mass varies. More importantly, they don’t account for the water absorbed by the coffee grounds themselves. If you aim for 500ml of brewed coffee in the carafe, you actually need to pour more than 500ml of water over the grounds because they’ll retain about 2 grams of water per gram of coffee. A scale lets you do “bypass brewing”: you place your entire brewer on the scale, tare it to zero, add your coffee, tare again, and then pour water until the number reads exactly the total brew weight you want (e.g., 500g of water for 31g of coffee). This method, used by professionals, guarantees absolute replicability. It’s the kind of precision that ensures every batch from partners like Shanghai Fumao is showcased perfectly.
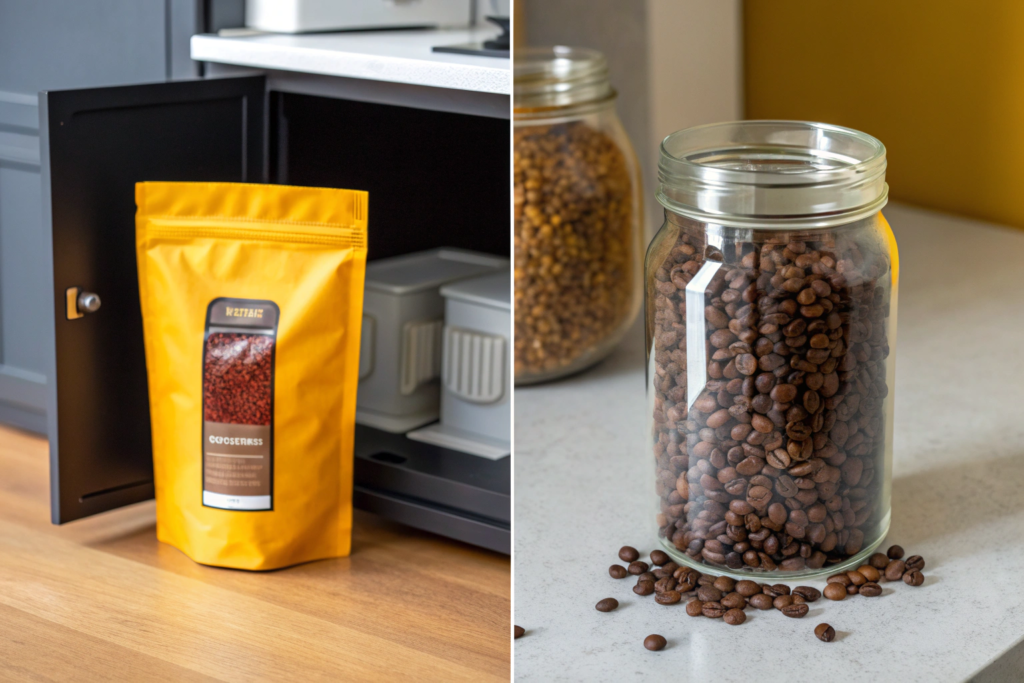
How does bean freshness and storage ruin your brew?
You bought amazing, freshly roasted beans. The first week was glorious. But now, a month later, it just tastes… stale. Flat. None of the vibrancy. This decline isn’t your imagination. Coffee is a fresh agricultural product. It’s constantly changing—and after roasting, it’s in a race against time. The enemy is oxygen, light, heat, and moisture.
Bean freshness and improper storage ruin your brew by allowing staling oxidation and the escape of volatile aromatic compounds, leading to a loss of sweetness, acidity, and complexity, leaving behind a dull, woody, or cardboard-like taste. The clock starts ticking the moment the beans are roasted. Whole beans stay fresh longer than ground coffee because grinding exposes vastly more surface area to the air.
How long after roasting is coffee best?
This is the “peak” window. For most filter brewing methods (pour-over, French press), the optimal flavor window is typically between 7 and 21 days after the roast date. Espresso often benefits from a slightly longer rest, from 10 to 30 days, as the beans degas. This is why buying beans with a clearly marked roast date is non-negotiable. Avoid bags that only have a “best by” date. At BeanofCoffee, we stamp the roast date on every export batch for transparency. Buying weekly or bi-weekly in smaller quantities is better than buying a huge bag monthly. It ensures you’re always in that sweet spot.
What is the absolute best way to store coffee at home?
Forget the pretty canister on the counter. Light and heat are killers. Here’s the simple rule: Cool, Dark, Dry, and Airtight. 1) Cool: Not in the fridge or freezer (constant temperature changes cause condensation, which is moisture). The freezer is only suitable for long-term storage (months) of an unopened, airtight bag, not for daily use. 2) Dark: Keep it in a cupboard, not on the windowsill. 3) Dry: Obviously. 4) Airtight: The bag it came in with a one-way valve is often perfect. Squeeze out the excess air and clip it shut. For the ultimate protection, transfer the beans to a dedicated opaque, airtight container. And only grind what you need for that brew. Keeping a stash of whole beans from a reliable source fresh allows you to appreciate the distinct profile of each origin we export.
Conclusion
Great coffee brewing isn’t about having the most expensive gear or mastering secret techniques. It’s about consistent execution of the fundamentals. By avoiding these common mistakes—managing your extraction through grind and time, using quality water at the right temperature, measuring accurately by weight, and respecting bean freshness—you take control. You move from hoping for a good cup to knowing how to create one, every single time.
Each of these factors is a link in a chain. Strengthen them all, and you unlock the true potential locked within your coffee beans. It turns a daily routine into a rewarding craft, where you can genuinely taste the care and quality of your chosen beans.
If your business is built on serving that perfect, consistent cup, it all starts with a foundation of exceptional green beans. At BeanofCoffee, we provide the stable, high-quality base—premium Yunnan Arabica, Catimor, and Robusta—that makes your brewing precision worthwhile. To discuss how our consistent supply can become the foundation of your coffee program, get in touch with our export manager, Cathy Cai. Let's build something remarkable, one perfect cup at a time. Reach Cathy at: cathy@beanofcoffee.com.