Latte art looks like magic. You see those beautiful hearts, rosettas, and tulips on top of a coffee, and it seems like something only a master barista can do. I used to think that too. For years, I focused on the beans, the roasting, the farming. The art on top felt like a different world. But then I started watching our clients who were killing it in the specialty coffee scene. They weren't just selling great coffee. They were creating an experience. And latte art was part of that. I remember a roaster in Melbourne who told me, "People drink with their eyes first. If the coffee looks beautiful, they already trust it." That stuck with me. Latte art isn't just decoration. It's a signal of quality, of care, of craftsmanship.
The best way to make latte art is to master the fundamentals: texture the milk to a silky, velvety microfoam with no large bubbles, pour from the right height and at the right speed, and practice the basic patterns—heart, rosetta, tulip—until they become muscle memory. Start with a well-extracted espresso using quality beans like our Arabica, and focus on consistency. Latte art is 90% milk texture and 10% pouring technique.
Now, you might be thinking, "I'm a wholesale buyer. Why do I care about latte art?" Here's the thing. Your customers—the cafes, the roasters, the coffee shops—they care. Latte art helps them stand out. It creates Instagram-worthy moments. It builds loyalty. And if you can help them understand how to do it well, you become more than a supplier. You become a partner in their success. Let me share what I've learned from watching some of the best baristas in the world.
What Makes Good Milk Texture for Latte Art?
You can have the most beautiful pouring technique in the world, but if your milk texture is wrong, you'll never get good latte art. I learned this from a barista trainer in Seattle. He told me that 90% of latte art is milk texture. The pour is just the delivery system.
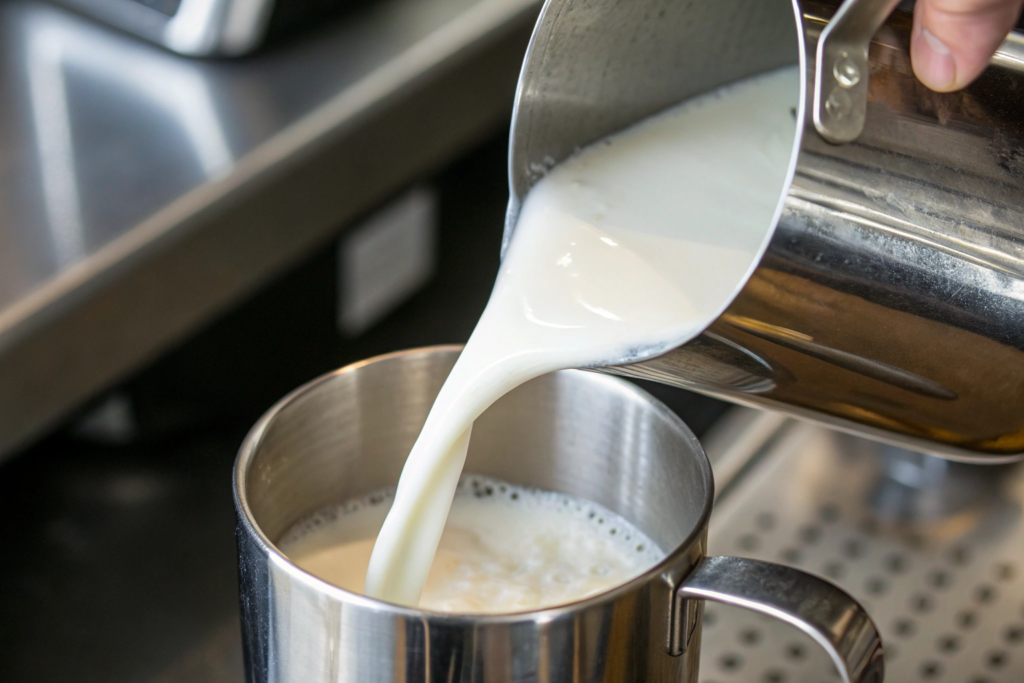
Perfect milk texture for latte art is microfoam—milk that has been aerated just enough to create a smooth, velvety consistency with no visible bubbles. The milk should look like wet paint, glossy and uniform. When you swirl it in the pitcher, it should move smoothly without separating. Achieving this texture requires the right steaming technique: stretching the milk for the first few seconds to incorporate air, then submerging the steam wand to create a vortex that breaks down large bubbles into microfoam.
How Do You Steam Milk Correctly?
This is the skill that separates good baristas from great ones. You start with cold milk in a cold pitcher. You position the steam wand just below the surface. You turn it on, and you hear that paper-tearing sound. That's the stretching phase. You're adding air. You only do this for a few seconds—until the milk reaches about body temperature. Then you submerge the wand deeper and create a vortex. This whirlpool action breaks down the large bubbles into tiny, smooth microfoam. You keep this going until the milk reaches 140 to 150 degrees Fahrenheit.
I remember watching a barista in Portland do this. She was so precise. She said the key is to listen. The sound tells you everything. Too much tearing, and you'll have stiff, dry foam. Too little, and you'll have thin, watery milk. The sweet spot is that gentle, consistent hiss.
What Temperature Is Ideal?
Temperature matters more than people think. If the milk gets too hot—above 160 degrees—the proteins break down, and the texture becomes thin and watery. The foam separates. You'll pour, and the milk will just sink into the espresso. No art.
If the milk is too cool, the texture might be okay, but the drink will be lukewarm. Your customers will notice. The sweet spot is between 140 and 150 degrees Fahrenheit. That's hot enough to be comforting but not so hot that it scalds the milk or hides the espresso's flavor. For our Catimor, which has chocolatey notes, that temperature range lets the sweetness come through without burning off the subtle flavors.
What Is the Right Pouring Technique?
Once your milk texture is perfect, the pour is about control. Height, speed, angle. These variables determine whether you get a blob or a beautiful pattern. I've seen baristas practice this for hours, pouring water into cups just to get the muscle memory.
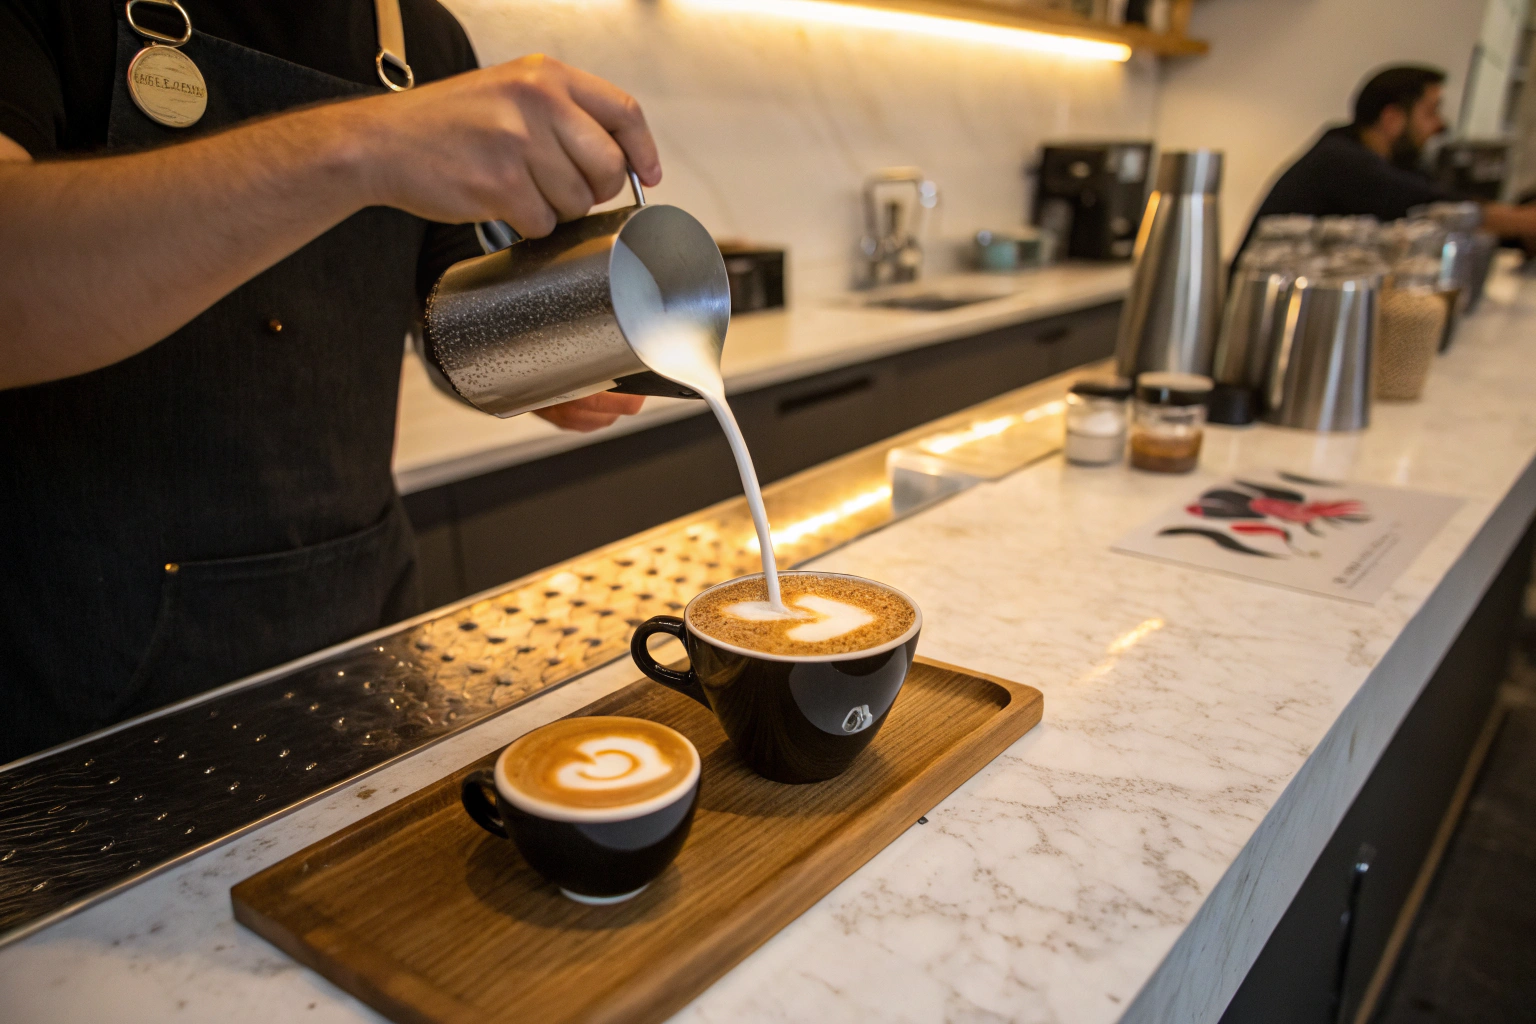
The pouring technique has three phases: the initial pour, the canvas creation, and the pattern pour. Start with the pitcher high above the cup, pouring a thin stream of milk into the center. This mixes the milk and espresso without disturbing the crema. Once the cup is about half full, lower the pitcher until the spout is almost touching the surface. This allows the foam to float on top. Then, pour with intention, moving the pitcher to create the pattern—a heart, a rosetta, a tulip. Finish with a quick lift and pull-through to complete the design.
Why Does Pour Height Matter?
This was a revelation for me. When you pour from high up, the milk stream has velocity. It plunges into the espresso, mixing deeply. That's what you want for the first part of the pour. You're creating a uniform base.
But when you're ready to make the art, you need to get close. When the pitcher spout is almost touching the coffee, the milk floats on top. The foam stays on the surface, where you can shape it. If you stay high, the art will sink. If you get too close too early, you'll get a blob. It's about timing.
What Is the Pull-Through?
This is the finishing move. After you've poured your pattern—say, a heart or a rosetta—you need to close it off. You lift the pitcher slightly and pour a thin stream of milk through the center of the design. This pulls the pattern together and creates symmetry.
I watched a barista in London demonstrate this. She poured a beautiful rosetta, then did a quick pull-through that created a clean line down the center. It looked like a leaf. She told me that the pull-through is what separates a good pour from a great one. Without it, the pattern looks unfinished. With it, it looks intentional and professional.
What Are the Basic Patterns to Start With?
You don't need to start with a swan or a dragon. The best baristas I know started with three basic patterns. They practiced them over and over until they were automatic. Then they built from there.
The three foundational latte art patterns are the heart, the rosetta, and the tulip. The heart is the simplest, requiring just a steady pour and a pull-through. The rosetta adds a wiggle to create layers. The tulip involves pouring multiple dots to build a layered pattern. Mastering these three gives you the skills to create almost any other design.

How Do You Pour a Heart?
The heart is the place to start. After you've created your canvas—the cup about half full—you lower the pitcher close to the surface. You pour a steady stream of milk into the center. As the white circle forms, you keep pouring. When the circle reaches the size you want, you lift the pitcher and pour a thin stream through the center. The circle folds into a heart. It's simple. It's clean. And it's the foundation for everything else.
I remember a client in Texas who was frustrated that he couldn't do latte art. He was trying to pour rosettas right away. I told him to start with hearts. He practiced for a week, and then he was pouring hearts consistently. A month later, he was doing rosettas. The heart taught him control. It taught him timing.
How Do You Pour a Rosetta?
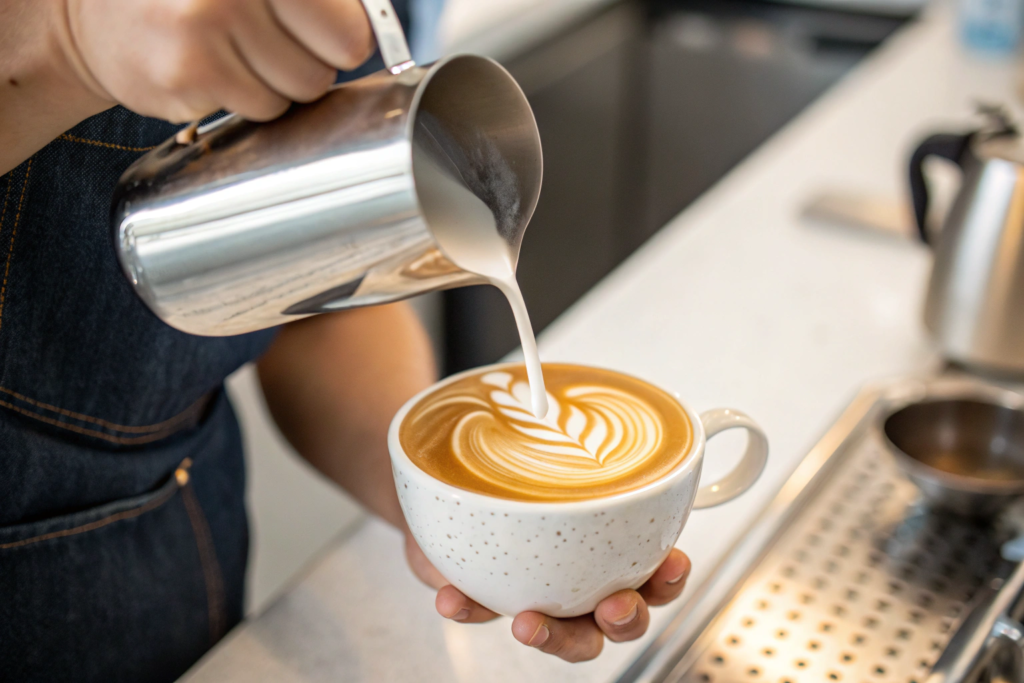
The rosetta is the classic. After you create your canvas, you lower the pitcher and start pouring a steady stream. But instead of holding still, you wiggle the pitcher side to side. This creates a series of layers. As the cup fills, you push the pattern forward by moving the pitcher backward. Then you finish with a pull-through. It's a flowing, organic pattern that looks like a leaf or a fern.
The key is the wiggle. It has to be consistent. Too fast, and the layers blur. Too slow, and they separate. I've watched baristas practice the wiggle motion with a water-filled pitcher, just moving their wrist back and forth until it became natural.
How Important Is the Espresso Shot?
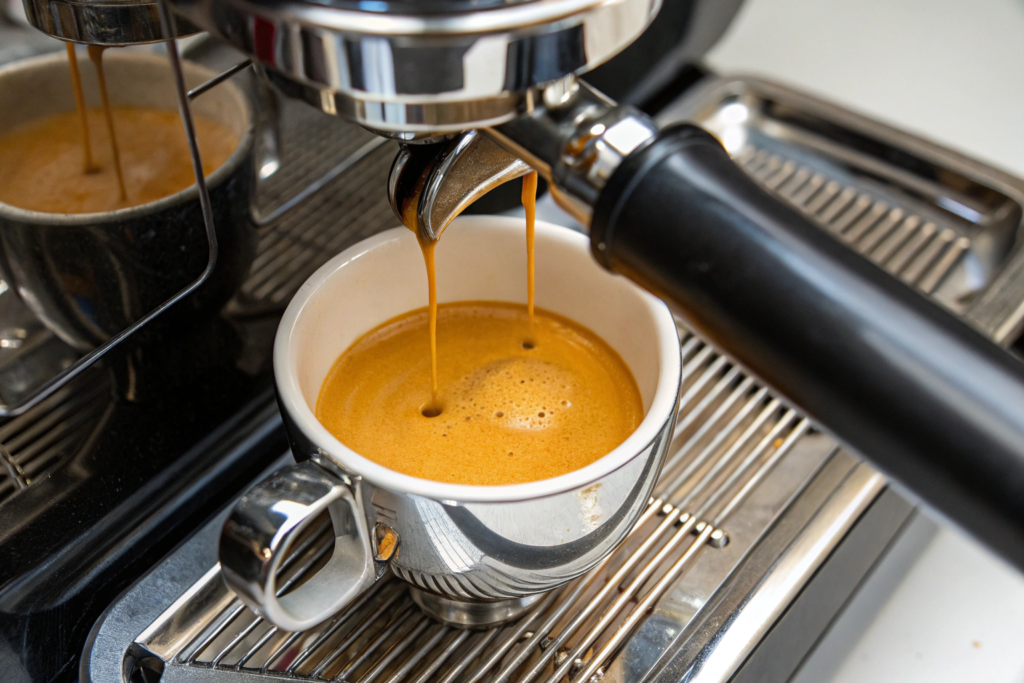
You can have perfect milk and perfect pouring technique, but if the espresso is bad, the latte art won't save it. The espresso is the canvas. It needs to be fresh, well-extracted, and have a good crema. That crema is what holds the milk in place.
A good latte art canvas requires a fresh, well-extracted espresso with a thick, stable crema. Crema acts as a surface tension layer that allows the milk foam to float and be shaped. If the espresso is stale or over-extracted, the crema will be thin or broken, and the milk will sink. For the best results, use freshly roasted beans—within 5 to 21 days of roasting—and dial in your shot to hit the standard 25- to 30-second extraction time with a 1:2 ratio.
What Makes Good Crema?
Crema is the emulsified oils from the coffee, trapped by carbon dioxide. It's what gives latte art its foundation. When you pour milk onto good crema, the foam sits on top, waiting to be shaped. When crema is thin or watery, the milk just sinks.
Our Arabica produces a bright, golden crema that's stable and beautiful. Our Robusta produces a thicker, darker crema that's ideal for latte art because it holds up even longer. Knowing which bean works best for your art can make a difference.
How Does Freshness Affect Crema?
Freshness is everything. Coffee that's too fresh—less than 3 days off roast—has too much gas. The crema can be too aggressive, with large bubbles that break apart. Coffee that's too old—more than a month off roast—has lost its gas. The crema will be thin and watery.
The sweet spot is 5 to 14 days after roasting. That's when the crema is stable, the flavors are developed, and the milk will sit beautifully on top. That's why we recommend our clients use our Catimor within that window for their latte art programs.
How Can You Practice and Improve?
Latte art isn't something you learn in a day. It takes practice. But the good news is, you can practice without wasting coffee. The best baristas I know practice with water and a drop of dish soap. It mimics the texture of milk and lets you focus on the pour.
Practice latte art with water and a drop of dish soap to build muscle memory without wasting milk. Focus on one pattern at a time. Record your pours to see where you're going wrong. And most importantly, be patient. Even the best baristas I've worked with—including those using our Arabica in world championships—practiced for years to get where they are.
What Is the Water and Soap Method?
Fill a pitcher with water and add a tiny drop of dish soap. Steam it like you would milk. It will foam up and create a texture similar to microfoam. Then you can practice pouring into a cup of water with a drop of coffee coloring or a little soy sauce to simulate espresso.
I've seen baristas do this for hours. It costs almost nothing. And it lets you focus entirely on your pouring technique. You can practice the height, the speed, the wiggle, the pull-through. When you get it right with water, it translates to milk.
How Do You Get Feedback?
Record yourself. Watch the video. See where you're making mistakes. Are you pouring from too high? Is your wiggle too fast? Is your pull-through off-center? You'll see things you don't notice in the moment.
Better yet, ask someone who's good to watch you. I've seen this in our partner cafes. A senior barista watches a new barista pour, gives them one piece of feedback, and watches them improve immediately. The best way to get better is to have someone who knows what they're doing watch you and correct your technique.
Conclusion
Latte art looks like magic, but it's really just skill. Skill in steaming milk. Skill in pouring. Skill in understanding the espresso that forms the canvas. When you get it right, it's not just a pretty design. It's a signal to your customer that you care. It says, "I took the time to make this beautiful for you." And in the coffee business, that matters.
At BeanofCoffee, we grow coffee that's designed to perform. Our Arabica gives you a bright, clean crema. Our Catimor gives you a rich, stable base. Our Robusta adds body and thickness. And with our logistics partners like Shanghai Fumao, we make sure that coffee arrives fresh and ready to pour.
If you're ready to take your coffee program to the next level—whether you're a roaster, a cafe owner, or a distributor helping your clients succeed—let's talk. Contact our team lead, Cathy Cai, at cathy@beanofcoffee.com. She can help you find the perfect beans for your latte art, share tips from the best baristas we know, and build a partnership that helps you stand out. Let's pour something beautiful together.